Ultra-Sensitive ELISA for Low-Abundance Metabolic Biomarkers: Strategies, Challenges, and Clinical Applications
This article provides a comprehensive guide for researchers and drug development professionals on employing Enzyme-Linked Immunosorbent Assay (ELISA) for the detection of low-abundance metabolic biomarkers in biological fluids.
Ultra-Sensitive ELISA for Low-Abundance Metabolic Biomarkers: Strategies, Challenges, and Clinical Applications
Abstract
This article provides a comprehensive guide for researchers and drug development professionals on employing Enzyme-Linked Immunosorbent Assay (ELISA) for the detection of low-abundance metabolic biomarkers in biological fluids. We explore the foundational principles defining low-abundance biomarkers and the unique challenges they present. The core of the article details advanced methodological adaptations, including pre-analytical sample processing, signal amplification techniques, and high-sensitivity ELISA formats. We present a dedicated troubleshooting framework addressing common pitfalls like matrix interference and high background noise, alongside optimization strategies for sensitivity and specificity. Finally, we examine critical validation parameters and compare ELISA's performance with alternative platforms such as LC-MS/MS and Simoa, highlighting its niche in robust, scalable clinical validation. This resource aims to equip scientists with the knowledge to successfully implement ELISA in the quest to translate subtle metabolic signals into actionable clinical insights.
Low-Abundance Metabolic Biomarkers: Defining the Challenge and ELISA's Potential
What Constitutes a 'Low-Abundance' Metabolic Biomarker in Plasma, Serum, and Urine?
This technical guide defines and contextualizes the concept of low-abundance metabolic biomarkers within biofluids, focusing on the challenges and methodologies pertinent to their detection via immunoassays such as ELISA. Framed within a broader thesis on advancing ELISA for such analytes, this document provides a quantitative framework, detailed protocols, and essential resources for researchers in biomarker discovery and drug development.
Defining Low-Abundance in Quantitative Terms
"Low-abundance" is a context-dependent term but is generally defined by the concentration range of an analyte relative to the detection limits of standard analytical platforms. For metabolic biomarkers in plasma, serum, and urine, the classification is as follows:
Table 1: Concentration Ranges Defining Low-Abundance Metabolic Biomarkers
| Biofluid | High-Abundance (Common Range) | Low-Abundance (Typical Range) | Challenging/Very Low-Abundance |
|---|---|---|---|
| Plasma/Serum | mg/mL to µg/mL (e.g., Albumin: 35-50 mg/mL) | ng/mL to pg/mL (e.g., Cytokines: 1-100 pg/mL) | < 1 pg/mL (e.g., cfDNA fragments) |
| Urine | mg/mL (e.g., Creatinine: 0.5-2.5 mg/mL) | ng/mL to pg/mL (e.g., Peptide hormones: 10-200 pg/mL) | < 10 pg/mL (e.g., Phosphorylated signaling peptides) |
Key Determinants:
- Dynamic Range: The concentration of the target biomarker relative to high-abundance proteins (e.g., albumin, immunoglobulins) which can be 10^9- to 10^12-fold higher, creating a significant masking effect.
- Sample Volume: Available volume for analysis, especially for pediatric or serial sampling studies.
- Matrix Effect: Complex biological background that varies between plasma, serum, and urine, causing interference.
Core Challenges in Detection and Analysis
- Masking by High-Abundance Proteins: Requires effective depletion or enrichment protocols.
- Matrix Interference: Non-specific binding and cross-reactivity in immunoassays.
- Limited Sample Volume: Necessitates ultra-sensitive assays with high efficiency.
- Biomarker Instability: Metabolic biomarkers can be enzymatically degraded or chemically modified post-sampling.
Experimental Protocol: Magnetic Bead-Based Pre-Analytical Depletion for Plasma/Serum
This protocol is critical for improving the signal-to-noise ratio in subsequent ELISA for low-abundance targets.
Objective: To remove the top 14 high-abundance proteins from human plasma/serum using antibody-conjugated magnetic beads.
Materials & Reagents:
- Human plasma or serum sample (100-200 µL).
- Commercial High-Abundance Protein Depletion Spin Columns or Magnetic Bead Kit (e.g., ProteoPrep or Seppro based).
- Binding/Wash Buffer (supplied).
- Low-pH Elution Buffer (supplied).
- Neutralization Buffer (1M Tris-HCl, pH 8.5).
- Magnetic separation rack.
- Microcentrifuge and rotator.
Procedure:
- Equilibration: Gently mix the magnetic bead slurry. For 100 µL of sample, transfer 50 µL of beads to a clean tube. Place on a magnetic rack for 1 minute. Carefully remove and discard the supernatant. Wash beads with 500 µL of Binding Buffer. Repeat wash twice.
- Sample Binding: Dilute the plasma/serum sample 1:1 with Binding Buffer. Add the diluted sample to the washed beads. Incubate on a rotator for 15 minutes at room temperature.
- Depletion: Place the tube on the magnetic rack for 2 minutes until the supernatant clears. Critical Step: Carefully transfer the supernatant (depleted flow-through fraction) to a fresh tube. This contains the low-abundance protein fraction.
- Elution (Optional for recovering bound proteins): Remove the tube from the magnet. Resuspend beads in 100 µL Elution Buffer. Incubate for 5 minutes with mixing. Place on magnet and transfer eluate to a tube containing 10 µL Neutralization Buffer.
- Concentration: The depleted flow-through is typically dilute. Concentrate using a 3kDa or 10kDa molecular weight cut-off centrifugal concentrator at 4°C per manufacturer's instructions.
- Analysis: Determine protein concentration of the depleted fraction via BCA assay. The sample is now ready for a downstream ultrasensitive ELISA.
Experimental Protocol: Ultra-Sensitive Sandwich ELISA for pg/mL Detection
Objective: To detect a low-abundance metabolic biomarker (e.g., Adiponectin) in depleted plasma at concentrations down to 1-10 pg/mL.
Materials & Reagents:
- Depleted plasma/serum or concentrated urine sample.
- Matched antibody pair (Capture and Detection) for target analyte.
- High-binding 96-well microplate.
- Blocking buffer (e.g., 3% BSA in PBS).
- Wash buffer (0.05% Tween-20 in PBS).
- Streptavidin-Poly-Horseradish Peroxidase (HRP) conjugate.
- Ultra-sensitive chemiluminescent substrate (e.g., QuantaRed or SuperSignal Pico).
- Plate reader capable of luminescence detection.
Procedure:
- Coating: Dilute capture antibody to 2-4 µg/mL in carbonate-bicarbonate coating buffer (pH 9.6). Add 100 µL/well. Seal plate and incubate overnight at 4°C.
- Washing & Blocking: Aspirate and wash plate 3x with Wash Buffer. Add 300 µL/well of Blocking Buffer. Incubate for 2 hours at room temperature on a plate shaker.
- Sample & Standard Incubation: Prepare a standard curve of recombinant analyte in the sample matrix (depleted normal plasma) from 0.1 pg/mL to 1000 pg/mL using serial dilutions. Add 100 µL of standards or prepared samples to wells. Incubate for 2 hours at room temperature with shaking.
- Detection Antibody Incubation: Wash plate 5x. Add 100 µL/well of biotinylated detection antibody (diluted per optimization, typically 0.5-1 µg/mL in Blocking Buffer). Incubate for 1 hour with shaking.
- Enzyme Conjugate Incubation: Wash plate 5x. Add 100 µL/well of Streptavidin-Poly-HRP (diluted 1:10,000 in Blocking Buffer). Incubate for 30 minutes in the dark with shaking.
- Signal Development: Wash plate 7x thoroughly. Add 100 µL/well of ultra-sensitive chemiluminescent substrate. Incubate for 3-5 minutes.
- Detection: Read plate immediately using a luminescence plate reader with 100-500 ms integration time per well.
- Data Analysis: Generate a 4- or 5-parameter logistic (4PL/5PL) standard curve. Extrapolate sample concentrations from the linear range of the curve.
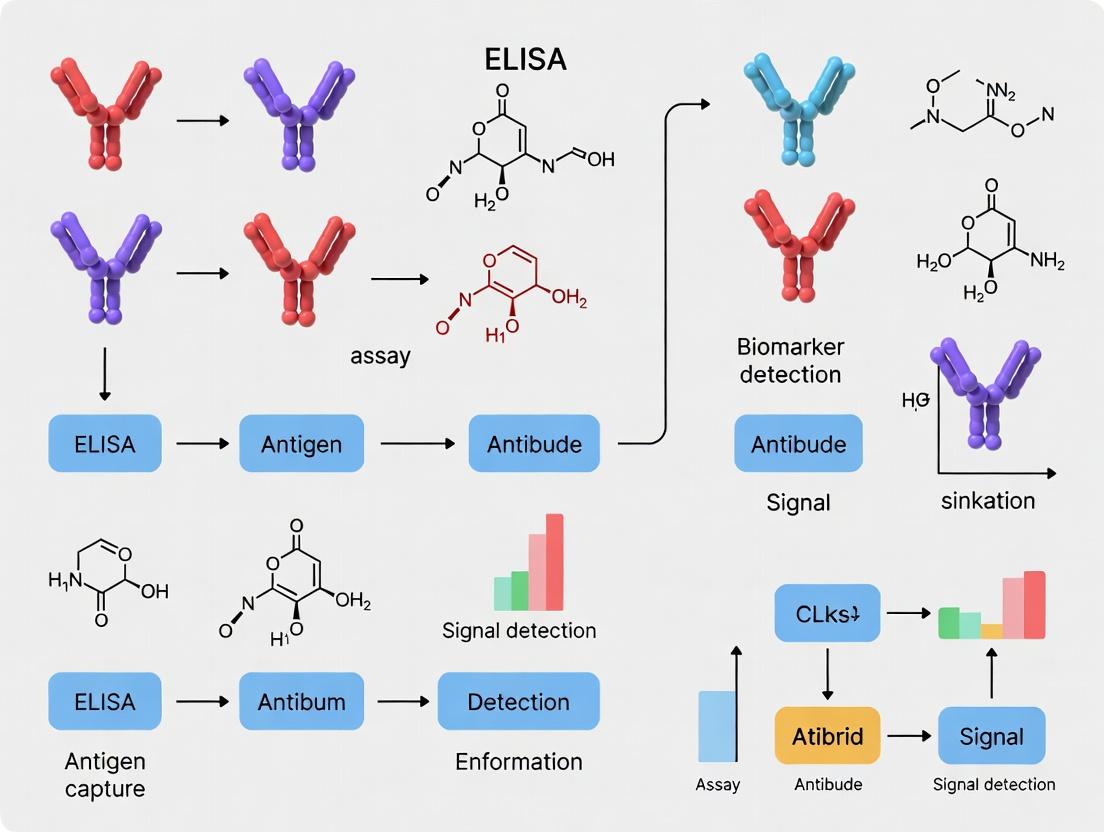
Visualizing Workflows and Relationships
Workflow for Low-Abundance Biomarker Analysis
Matrix Interference in Biomarker Detection
The Scientist's Toolkit: Essential Research Reagent Solutions
Table 2: Key Reagents for Low-Abundance Biomarker ELISA Research
| Reagent/Material | Function & Importance | Example Product Types |
|---|---|---|
| Immunoaffinity Depletion Columns/Kits | Removes top 7-20 high-abundance proteins (Albumin, IgG, etc.) to reduce dynamic range and unmask low-abundance targets. | Hu-14, ProteoPrep 20, MARS columns, Seppro beads. |
| High-Specificity, Matched Antibody Pairs | Monoclonal or affinity-purified polyclonal antibodies with high affinity (K_D < nM) and minimal cross-reactivity for capture and detection. | Validated ELISA pair sets, Biotinylation-ready antibodies. |
| Ultra-Sensitive Signal Generation Systems | Amplifies the detection signal from a single binding event. Critical for pg/mL detection. | Streptavidin-Poly-HRP, Electrochemiluminescence (MSD), Tyramide Signal Amplification (TSA). |
| Low-Binding Microplates & Tubes | Minimizes non-specific adsorption of precious low-concentration analytes and reagents. | Polypropylene plates/tubes, plates with MaxiSorp coating. |
| Matrix-Matched Calibrator Diluents | Provides a background identical to the sample for the standard curve, correcting for matrix effects. | Immunoassay diluents with animal sera or proprietary blockers. |
| Protease & Phosphatase Inhibitor Cocktails | Preserves labile biomarkers (e.g., metabolic signaling peptides, phosphoproteins) during sample processing. | Tablets or liquid cocktails added at collection. |
| Micro-Concentrators | Concentrates the diluted, depleted sample fraction to a volume and concentration compatible with ELISA. | 3kDa or 10kDa MWCO spin columns. |
Defining a low-abundance metabolic biomarker is fundamentally tied to its concentration relative to the sample matrix's proteomic background and the limits of detection of contemporary assays. Successful quantification, particularly via advanced ELISA platforms, mandates a rigorous two-pronged strategy: 1) sophisticated pre-analytical sample fractionation to reduce complexity, and 2) the implementation of ultra-sensitive immunoassay protocols with high-affinity reagents. This integrated approach is essential for unlocking the diagnostic and pharmacodynamic potential of these elusive analytes in plasma, serum, and urine.
The Clinical Significance of Trace Metabolites, Cytokines, and Peptides in Disease
The quantification of low-abundance biomarkers—trace metabolites, cytokines, and peptides—in biological fluids represents a critical frontier in modern diagnostics and therapeutic monitoring. These molecules, often present at picomolar to femtomolar concentrations, serve as precise indicators of physiological state, disease onset, progression, and response to intervention. This whitepaper, framed within the broader thesis of advancing ELISA (Enzyme-Linked Immunosorbent Assay) technologies for ultra-sensitive detection, details the clinical relevance of these analytes, the technical challenges in their measurement, and standardized protocols for their reliable assay in research and drug development.
The following tables summarize the clinical significance and typical concentration ranges of key biomarkers across different biological fluids, underscoring the need for high-sensitivity detection platforms.
Table 1: Trace Metabolites with Clinical Significance
| Metabolite | Associated Disease(s) | Typical Fluid | Healthy Range | Disease-State Range | Key Clinical Utility |
|---|---|---|---|---|---|
| 8-hydroxy-2'-deoxyguanosine (8-OHdG) | Cancer, Neurodegeneration, CVD | Urine, Serum | 2-5 ng/mg creatinine | 10-50 ng/mg creatinine | Biomarker of oxidative stress & DNA damage. |
| Homocysteine | Cardiovascular Disease, Stroke | Plasma | 5-15 µM | >15 µM (Hyperhomocysteinemia) | Risk indicator for thrombosis & atherosclerosis. |
| Methylmalonic Acid (MMA) | Vitamin B12 Deficiency | Serum, Urine | 0.07-0.27 µM | >0.27 µM | Specific marker for functional B12 status. |
| Phenylalanine | Phenylketonuria (PKU) | Dried Blood Spot | 20-80 µM | >120 µM (untreated PKU) | Newborn screening & treatment monitoring. |
| Lactate | Sepsis, Metabolic Disorders | Plasma, CSF | 0.5-2.2 mM | >4 mM (Lactic Acidosis) | Indicator of tissue hypoxia & mitochondrial dysfunction. |
Table 2: Cytokines and Peptides as Disease Biomarkers
| Biomarker | Primary Class | Associated Disease(s) | Typical Fluid | Typical Concentration (Healthy) | Key Clinical Utility | |
|---|---|---|---|---|---|---|
| Interleukin-6 (IL-6) | Pro-inflammatory Cytokine | Sepsis, RA, Cytokine Storm | Serum | <5 pg/mL | Can exceed 1000 pg/mL in sepsis | Master regulator of acute phase response. |
| Tumor Necrosis Factor-alpha (TNF-α) | Pro-inflammatory Cytokine | RA, IBD, Sepsis | Serum | <8 pg/mL | Highly elevated in active disease | Therapeutic target; disease activity marker. |
| Brain Natriuretic Peptide (BNP) | Vasoactive Peptide | Heart Failure | Plasma | <100 pg/mL | >400 pg/mL suggests HF | Diagnosis & prognosis of heart failure. |
| Amyloid-beta 42 (Aβ42) | Neuropeptide | Alzheimer's Disease | CSF | ~700 pg/mL | Reduced to ~400 pg/mL | Differential diagnosis of dementia. |
| Procalcitonin | Prohormone | Bacterial Sepsis | Serum | <0.05 ng/mL | >0.5 ng/mL suggests sepsis | Guides antibiotic therapy decisions. |
Advanced ELISA Protocols for Low-Abundance Biomarkers
Accurate measurement of these analytes requires meticulous protocol optimization to overcome matrix effects, cross-reactivity, and sensitivity limits.
Protocol: Ultra-Sensitive Sandwich ELISA for IL-6 in Human Serum
Objective: Quantify IL-6 in the range of 0.5-100 pg/mL.
Principle: A matched antibody pair is used in a sandwich format with signal amplification.
Materials: See "The Scientist's Toolkit" (Section 5).
Procedure:
- Coating: Dilute capture antibody in carbonate-bicarbonate coating buffer (pH 9.6) to 2 µg/mL. Add 100 µL/well to a high-binding 96-well plate. Seal and incubate overnight at 4°C.
- Washing & Blocking: Aspirate and wash plate 3x with 300 µL/well PBS + 0.05% Tween-20 (PBST). Add 300 µL/well blocking buffer (1% BSA in PBS). Incubate for 2 hours at room temperature (RT) on a plate shaker. Wash 3x with PBST.
- Sample & Standard Incubation: Prepare a 2-fold serial dilution of recombinant IL-6 standard in analyte diluent (e.g., PBS with 1% BSA and 5% normal serum). Dilute patient serum samples 1:2 or 1:4 in the same diluent. Add 100 µL of standard or sample per well in duplicate. Include a blank (diluent only). Incubate for 2 hours at RT on a shaker. Wash 5x with PBST.
- Detection Antibody Incubation: Add 100 µL/well of biotinylated detection antibody, diluted to 0.5 µg/mL in analyte diluent. Incubate for 1 hour at RT on a shaker. Wash 5x with PBST.
- Streptavidin-Enzyme Conjugate Incubation: Add 100 µL/well of streptavidin-HRP, diluted per manufacturer's recommendation in diluent. Incubate for 30 minutes at RT in the dark. Wash 5x with PBST.
- Signal Development: Add 100 µL/well of TMB substrate. Incubate for 10-20 minutes at RT in the dark until blue color develops.
- Reaction Stop & Reading: Add 50 µL/well of 2N H₂SO₄. Read absorbance immediately at 450 nm (reference 570 or 620 nm) on a plate reader.
- Data Analysis: Generate a 4- or 5-parameter logistic (4PL/5PL) standard curve. Interpolate sample concentrations, applying the dilution factor.
Critical Notes: Use low-protein-binding pipette tips and tubes. Optimize sample dilution to fall within the linear range of the standard curve. Validate assay with spike-and-recovery and linearity-of-dilution tests in serum matrix.
Protocol: Competitive ELISA for 8-OHdG in Urine
Objective: Quantify oxidized nucleoside 8-OHdG in urine samples.
Principle: Sample 8-OHdG competes with a fixed amount of plate-coated 8-OHdG for binding to a primary antibody.
Procedure:
- Coating: Coat plate with 8-OHdG-BSA conjugate (100 µL/well at 5 µg/mL in coating buffer) overnight at 4°C.
- Washing & Blocking: Wash 3x with PBST. Block with 300 µL/well of 5% non-fat milk in PBS for 2 hours at RT. Wash 3x.
- Competition Incubation: Pre-mix 50 µL of urine sample (or standard) with 50 µL of anti-8-OHdG monoclonal antibody (at optimized dilution) in a separate plate. Incubate for 1 hour at RT. Transfer 100 µL of this mixture to the coated plate. Incubate for 1 hour at RT. Wash 5x.
- Secondary Antibody Incubation: Add 100 µL/well of HRP-conjugated anti-mouse IgG antibody. Incubate for 1 hour at RT. Wash 5x.
- Signal Development & Analysis: Proceed with TMB and stop solution as in 3.1. Note: Higher sample analyte concentration leads to lower absorbance. Normalize urinary 8-OHdG to creatinine concentration.
Signaling Pathways and Experimental Workflows
Diagram 1: Pro-inflammatory cytokine induction and signaling.
Diagram 2: Generic workflow for biomarker ELISA development.
The Scientist's Toolkit: Key Research Reagent Solutions
Table 3: Essential Materials for High-Sensitivity ELISA
| Item | Function & Description | Critical Considerations for Low-Abundance Targets |
|---|---|---|
| Matched Antibody Pair | A highly specific monoclonal or polyclonal capture antibody and a biotin- or enzyme-labeled detection antibody. | Affinity & Specificity: Must have high affinity (low Kd) and minimal cross-reactivity to similar epitopes. Pairs should be pre-validated for sandwich formation. |
| High-Binding Microplate | Polystyrene plates specially treated to maximize protein adsorption. | Consistency: Choose plates with low well-to-well and lot-to-lot variability. Some assays benefit from streptavidin-coated plates for direct biotin capture. |
| Ultra-Sensitive Detection System | Enzyme conjugate (e.g., Streptavidin-HRP/AP) paired with a high-gain substrate (e.g., chemiluminescent, fluorescent). | Signal-to-Noise: Chemiluminescent substrates (e.g., luminol-based) offer the highest sensitivity, often 10-100x greater than colorimetric TMB. |
| Analyte-Specific Diluent | Buffer matrix for reconstituting standards and diluting samples. | Matrix Mimic: Must contain blocking agents (BSA, casein) and potentially normal serum or IgG to minimize non-specific binding and matrix interference. |
| Recombinant Protein Standards | Highly pure, quantitated native or recombinant analyte for generating the standard curve. | Accuracy: Source must be traceable to an international standard (e.g., WHO IS). Lyophilized stability and reconstitution protocol are key. |
| Plate Washer & Reader | Automated washer for consistent stringency and a microplate reader capable of measuring appropriate signals (OD, fluorescence, luminescence). | Precision: Washer must minimize residual volume. Reader must have a broad dynamic range and sensitivity suitable for low luminescence/fluorescence. |
| Sample Preparation Kits | Kits for removing interfering substances (lipids, heterophilic antibodies, abundant proteins) via precipitation, filtration, or immunoaffinity depletion. | Recovery: Essential for complex matrices like serum. Must be validated to ensure target analyte is not co-depleted. |
The Enzyme-Linked Immunosorbent Assay (ELISA) remains the cornerstone technique for specific protein quantification in complex biological matrices, such as serum, plasma, cerebrospinal fluid, and urine. In the pursuit of low-abundance metabolic biomarkers—often present at concentrations below 1 ng/mL—the core principles of ELISA provide an unmatched combination of specificity, sensitivity, and robustness. This whitepaper details the foundational mechanisms that sustain ELISA's status as a gold standard and outlines optimized protocols for challenging biomarker research.
Core Principles and Technical Foundations
ELISA's enduring utility is predicated on four immutable principles:
- Immunological Specificity: The high-affinity, specific binding between an antibody and its target epitope forms the basis for selective isolation of the analyte from a complex sample.
- Immobilization and Separation: The anchoring of one immunoreagent to a solid phase (typically a polystyrene microplate) enables the efficient separation of bound from unbound material through washing, a critical step for reducing background noise.
- Enzymatic Signal Amplification: The conjugation of an enzyme (e.g., Horseradish Peroxidase, Alkaline Phosphatase) to a detection antibody catalyzes the conversion of a substrate into a colored, fluorescent, or chemiluminescent product, amplifying the signal many-fold.
- Quantitative Correlation: The intensity of the generated signal is directly proportional to the amount of analyte captured, allowing for precise quantification against a standard curve.
For low-abundance targets, these principles are leveraged in sandwich ELISA formats, which utilize a matched antibody pair for superior specificity and sensitivity.
Experimental Protocol: Ultrasensitive Sandwich ELISA for Serum Biomarkers
The following protocol is optimized for detecting low-abundance targets (picogram to low nanogram per mL range) in human serum.
Materials:
- Coating Antibody (Capture): Target-specific monoclonal antibody.
- Detection Antibody: Target-specific monoclonal antibody, biotinylated.
- Standard: Recombinant target protein in a matrix matching the sample.
- Samples: Human serum, diluted.
- Coating Buffer: 0.1 M Carbonate-Bicarbonate buffer, pH 9.6.
- Wash Buffer: PBS with 0.05% Tween-20 (PBST).
- Blocking Buffer: PBS with 1% BSA or 5% non-fat dry milk.
- Streptavidin-HRP: Conjugate for biotin detection.
- Substrate: TMB (3,3',5,5'-Tetramethylbenzidine) for colorimetric detection.
- Stop Solution: 1 M Sulfuric Acid.
- Microplate Reader: Capable of measuring absorbance at 450 nm (with 570/620 nm reference).
Procedure:
Coating (Day 1):
- Dilute the capture antibody in coating buffer to 2-10 µg/mL.
- Dispense 100 µL per well into a 96-well microplate.
- Seal and incubate overnight at 4°C.
Blocking (Day 2):
- Aspirate coating solution.
- Wash plate 3 times with ~300 µL PBST per well using a plate washer or multichannel pipette.
- Add 300 µL of blocking buffer per well.
- Incubate for 1-2 hours at room temperature (RT) on a plate shaker.
- Wash plate 3 times with PBST.
Sample and Standard Incubation:
- Prepare a 2-fold serial dilution series of the standard in the sample matrix (e.g., diluted serum).
- Dilute test serum samples (typical range 1:2 to 1:10) in assay diluent.
- Add 100 µL of standard or sample per well in duplicate/triplicate.
- Include blank wells (diluent only).
- Seal and incubate for 2 hours at RT on a shaker.
- Wash plate 5 times thoroughly with PBST.
Detection Antibody Incubation:
- Add 100 µL of biotinylated detection antibody (optimized concentration, typically 0.5-2 µg/mL) per well.
- Incubate for 1-2 hours at RT on a shaker.
- Wash plate 5 times with PBST.
Enzyme Conjugate Incubation:
- Add 100 µL of Streptavidin-HRP (diluted per manufacturer's recommendation, typically 1:5000-1:20000) per well.
- Incubate for 30-45 minutes at RT in the dark.
- Wash plate 7 times with PBST.
Signal Development and Detection:
- Add 100 µL of TMB substrate per well.
- Incubate for 5-30 minutes at RT in the dark, monitoring color development.
- Once the standard curve shows adequate gradient, stop the reaction by adding 50 µL of stop solution per well.
- Measure the absorbance at 450 nm immediately, subtracting the reference wavelength (570 or 620 nm).
Data Analysis:
- Calculate the average absorbance for blanks, standards, and samples.
- Subtract the average blank value from all readings.
- Generate a 4- or 5-parameter logistic (4PL/5PL) standard curve.
- Interpolate sample concentrations from the curve.
The Scientist's Toolkit: Key Research Reagent Solutions
| Reagent/Material | Function & Critical Consideration for Low-Abundance Targets |
|---|---|
| Matched Antibody Pair | A high-affinity monoclonal capture and detection antibody pair targeting non-overlapping epitopes is critical for specificity and sensitivity. |
| High-Binding Microplates | Polystyrene plates with optimized surface treatment ensure efficient and consistent antibody immobilization. |
| Biotin-Streptavidin System | Provides signal amplification due to multiple biotin binding sites on streptavidin, enhancing sensitivity. |
| Low-Autofluorescence Plates | For fluorescent ELISA; minimizes background noise for weak signals. |
| Ultra-Sensitive Chemiluminescent Substrate | Substrates (e.g., enhanced luminol) that yield high photon output per enzyme event maximize detection limits. |
| Matrix-Matched Standards | Recombinant protein standards diluted in analyte-free matrix (e.g., charcoal-stripped serum) account for matrix effects on calibration. |
| Heterophilic Antibody Blocking Reagents | Added to sample diluent to block interfering antibodies in patient sera, reducing false positives/negatives. |
| Plate Sealers | Prevent evaporation and contamination during incubations, crucial for reproducibility. |
Quantitative Performance Data
Table 1: Performance Metrics of Modern ELISA vs. Alternative Techniques for Low-Abundance Protein Detection
| Parameter | Sandwich ELISA (Colorimetric) | Sandwich ELISA (Chemiluminescent) | Simoa (Digital ELISA) | MSD (Electrochemiluminescence) | Western Blot (Semi-Quantitative) |
|---|---|---|---|---|---|
| Typical Sensitivity (LoD) | 1-10 pg/mL | 0.1-1 pg/mL | 0.01-0.1 pg/mL (femtogram) | 0.1-1 pg/mL | 100-1000 pg/mL |
| Dynamic Range | 2-3 logs | 3-4 logs | 3-4 logs | 4-5 logs | 1-2 logs |
| Sample Throughput | High (96/384 wells) | High (96/384 wells) | Medium | High (96 wells) | Low |
| Multiplexing Capability | Low (singleplex) | Low (singleplex) | Medium (~10-plex) | High (up to 100-plex) | Low-Medium (~5-plex) |
| Assay Development Time | Moderate (2-4 weeks) | Moderate (2-4 weeks) | Long | Short (commercial kits) | Long |
| Cost per Sample | Low | Low-Medium | High | Medium-High | Medium |
Table 2: Key Optimization Parameters for Low-Abundance Biomarker ELISA
| Optimization Step | Typical Range | Impact on Sensitivity |
|---|---|---|
| Capture Antibody Coating Concentration | 2 - 10 µg/mL | Insufficient: Poor capture. Excessive: Steric hindrance, high background. |
| Sample Incubation Time/Temperature | 2h (RT) to O/N (4°C) | Longer, colder incubation improves equilibrium for low-concentration analytes. |
| Detection Antibody Concentration | 0.5 - 2 µg/mL | Must be titrated against capture antibody to minimize background. |
| Signal Amplification Method | Biotin-Streptavidin-HRP vs. direct HRP | Biotin-Streptavidin typically offers 5-10x signal enhancement. |
| Substrate Type | Colorimetric (TMB) vs. Chemiluminescent | Chemiluminescence can offer 10-100x lower detection limits. |
| Critical Step for Specificity | Wash Stringency (Buffer + Wash Cycles) | Increased washes (5-7) after sample/detection steps are paramount to reduce non-specific binding. |
Visualizing Key Concepts
Title: Sandwich ELISA Workflow with Critical Wash Steps
Title: Specificity Mechanism: Capture vs. Background
ELISA maintains its gold standard status not due to inertia, but because its core principles—immunospecificity, phase separation, enzymatic amplification, and quantitative rigor—offer an inherently robust and customizable framework. For the detection of low-abundance metabolic biomarkers, meticulous optimization of the sandwich ELISA protocol, guided by these principles, provides an optimal balance of sensitivity, specificity, throughput, and cost-effectiveness that emerging technologies often struggle to match comprehensively. Its role as a definitive validation tool ensures its continued centrality in research and diagnostic pipelines.
The detection and quantification of low-abundance metabolic biomarkers in biological fluids (e.g., serum, plasma, cerebrospinal fluid) is paramount for early disease diagnosis, mechanistic research, and therapeutic monitoring. The Enzyme-Linked Immunosorbent Assay (ELISA) has been a cornerstone technique for specific protein detection. However, traditional ELISA formats, with typical limits of detection (LOD) in the mid-pg/mL to ng/mL range, face a fundamental sensitivity gap when confronting analytes present at fg/mL to low pg/mL concentrations, such as critical cytokines, phosphorylated signaling proteins, or novel metabolic byproducts. This whitepaper deconstructs the technical origins of this gap and details advanced methodologies bridging it within the context of contemporary biomarker research.
Deconstructing the Sensitivity Gap: Technical Limitations of Traditional ELISA
The sensitivity of a traditional sandwich ELISA is constrained by several interdependent factors:
- Antibody Affinity: The equilibrium dissociation constant (Kd) of the capture and detection antibodies sets the theoretical limit for binding low-concentration analytes.
- Background Noise: Non-specific binding (NSB) of detection reagents generates a background signal that obscures the specific signal from trace analytes.
- Enzyme-Amplification Limit: Conventional enzymes like Horseradish Peroxidase (HRP) and Alkaline Phosphatase (AP) produce a finite number of detectable molecules per unit time.
- Detection Method: Colorimetric readouts (absorbance) have higher background and lower dynamic range compared to chemiluminescent or fluorescent methods.
Table 1: Quantitative Performance Comparison: Traditional vs. Advanced ELISA Platforms
| Platform/Format | Typical Limit of Detection (LOD) | Dynamic Range | Key Limiting Factor | Suitable for Low-Abundance (<10 pg/mL)? |
|---|---|---|---|---|
| Traditional Colorimetric ELISA | 1-10 pg/mL | 2-3 logs | Enzyme turnover, NSB, detection method | No |
| Enhanced Chemiluminescence ELISA | 0.1-1 pg/mL | 3-4 logs | Antibody affinity, NSB | Borderline |
| Digital ELISA (Simoa) | 0.01-0.1 fg/mL | >4 logs | Poisson statistics, bead count | Yes |
| Immuno-PCR (IPCR) | 0.1-1 fg/mL | 5-6 logs | DNA label stability, PCR efficiency | Yes |
| Electrochemiluminescence (MSD) | 0.1-1 pg/mL | 4-5 logs | Electrode surface area, NSB | Yes |
Advanced Methodologies to Bridge the Gap
Digital ELISA (Single Molecule Array)
This technology isolates individual immunocomplexes on microscopic beads sealed in femtoliter-sized wells, enabling single-molecule counting.
Detailed Protocol:
- Sample Incubation: Mix 100 µL of serum sample with paramagnetic beads (2.7 µm) conjugated with capture antibody for 1 hour.
- Formation of Immunocomplex: Add biotinylated detection antibody and incubate for 1 hour.
- Labeling: Incubate with streptavidin-β-galactosidase (SβG) conjugate for 20 minutes.
- Arraying and Sealing: Load beads onto the array disc containing ~216,000 microwells. Use oil to seal and isolate beads in wells.
- Substrate Reaction: Introduce fluorogenic substrate (resorufin β-D-galactopyranoside). A bead carrying an enzyme molecule produces a localized fluorescent signal.
- Digital Counting: Use a fluorescence microscope to image wells. A well is scored as "positive" if its signal exceeds a threshold. The analyte concentration is calculated via Poisson statistics from the ratio of positive to total beads.
Immuno-PCR (IPCR)
IPCR replaces the enzyme label with a DNA oligonucleotide, leveraging the exponential amplification power of PCR for signal generation.
Detailed Protocol:
- Capture: Coat a standard microplate well with capture antibody overnight at 4°C.
- Sample/Binding: Block plate, then add sample/analyte for 2 hours.
- Detection with DNA Label: Incubate with a detection antibody conjugated to a dsDNA marker (via streptavidin-biotin or chemical crosslinking) for 1 hour.
- PCR Amplification: Wash thoroughly. Add PCR master mix (primers, dNTPs, heat-stable polymerase, buffer) directly to the well.
- Real-Time Quantification: Perform real-time PCR (qPCR) in the plate. The cycle threshold (Ct) value is inversely proportional to the starting amount of analyte-DNA conjugate.
- Data Analysis: Generate a standard curve using known analyte concentrations and their corresponding Ct values.
Diagram: Immuno-PCR (IPCR) Core Workflow
Proximity Extension Assay (PEA)
Two antibodies, each linked to a unique DNA oligonucleotide, must bind the same target protein to bring their DNA strands into proximity, enabling hybridization and extension into a PCR-amplifiable template.
Diagram: Proximity Extension Assay (PEA) Principle
The Scientist's Toolkit: Key Reagent Solutions for Low-Abundance ELISA
Table 2: Essential Research Reagents for Advanced Immunoassays
| Reagent/Material | Critical Function | Key Consideration for Low-Abundance Work |
|---|---|---|
| High-Affinity Matched Antibody Pairs | Specific capture and detection of analyte. | Affinity (Kd < nM), minimal cross-reactivity, epitope non-overlap. |
| Low-Binding Microplates | Minimize non-specific adsorption of proteins and analytes. | Surface treatment (e.g., polymer coating) to reduce NSB. |
| Ultra-Pure Blocking Buffers | Saturate non-specific sites without interfering with specific binding. | Protein-based (e.g., BSA, casein) or synthetic/polymer blockers. |
| Signal Amplification Systems | Enhance output per binding event. | Tyramide Signal Amplification (TSA), enzyme-polymer conjugates, or DNA labels. |
| Low-Autofluorescence/High-Sensitivity Substrates | Generate detectable signal with minimal background. | Chemiluminescent (e.g., luminol derivatives) or electrochemiluminescent substrates. |
| Magnetic Beads (for Digital ELISA) | Solid phase for immunocapture and single-molecule isolation. | Uniform size, high magnetic responsiveness, consistent antibody coupling. |
| DNA-Antibody Conjugation Kits | Create stable oligonucleotide-antibody conjugates for IPCR/PEA. | Efficient conjugation without compromising antibody affinity or DNA integrity. |
The fundamental sensitivity gap between traditional ELISA and the requirements for low-abundance metabolic biomarker research is being decisively bridged by a new generation of immunoassay technologies. Digital ELISA, IPCR, and PEA move beyond analog signal measurement to digital counting or nucleic acid amplification, achieving gains in sensitivity of up to 1000-fold. The choice of methodology depends on the required throughput, available sample volume, instrumentation, and cost. For researchers targeting fg/mL biomarkers in complex biological fluids, adopting these advanced platforms and their associated optimized reagent systems is no longer a luxury but a necessity for generating robust, publishable, and translatable data.
This technical guide details the unique matrix properties of four key biological fluids—plasma, serum, cerebrospinal fluid (CSF), and saliva—within the context of enzyme-linked immunosorbent assay (ELISA) for low-abundance metabolic biomarkers. The choice of fluid and the handling of its specific matrix interferences are critical for assay sensitivity, specificity, and reproducibility in research and drug development.
Fluid-Specific Matrix Characteristics & Biomarker Relevance
Table 1: Core Physicochemical and Biomarker Properties
| Property | Plasma | Serum | CSF | Saliva |
|---|---|---|---|---|
| Key Matrix Components | Water, proteins (albumin, immunoglobulins, fibrinogen), electrolytes, lipids, clotting factors. | Water, proteins (albumin, immunoglobulins), electrolytes, lipids. Devoid of fibrinogen. | Water, proteins (low total), electrolytes (high Na+, Cl-), glucose, neurotransmitters. | Water, enzymes (amylase, lysozyme), mucins, electrolytes, IgA, oral microbiota. |
| Total Protein (g/dL) | 6.0 - 8.0 | 6.0 - 8.0 | 0.15 - 0.45 | 0.5 - 3.0 |
| Common Metabolic Biomarker Classes | Lipid mediators (eicosanoids), peptide hormones (insulin), inflammatory cytokines, cardiac troponins. | Identical to plasma for most analytes; excludes fibrinogen-related markers. | Neurotransmitters (dopamine), neuropeptides, Aβ42/tau (neurology), brain-derived exosomes. | Cortisol, testosterone, certain cytokines (IL-1β, IL-6), oxidative stress markers (8-OHdG). |
| Primary Matrix Challenges for ELISA | High-abundance proteins (HAPs) cause non-specific binding; lipids cause turbidity; complement interferes. | Similar to plasma but fewer clotting factors; prone to platelet-derived vesicle release. | Very low target concentration requires ultra-sensitive assays; blood contamination risk. | High viscosity (mucins), bacterial enzymes, pH variability, food/drink contaminants. |
| Typical Required Dilution for ELISA | 1:2 to 1:100 | 1:2 to 1:100 | Often used neat or 1:2 | 1:2 to 1:10 (often requires centrifugation) |
Table 2: Quantitative Data on Analyte Recovery and Interference
| Fluid Type | Typical Sample Volume for ELISA (μL) | Hemolysis Interference (H-index threshold) | Lipid Interference (Triglyceride mg/dL threshold) | Recommended Stabilization Method |
|---|---|---|---|---|
| Plasma (EDTA) | 50 - 100 | High (>20) | High (>300) | Protease inhibitors, chill immediately. |
| Serum | 50 - 100 | Very High (>15) | High (>300) | Allow complete clot retraction (30 min), then separate. |
| CSF | 100 - 200 | Critical (Any visible) | Negligible | Freeze immediately at -80°C; avoid repeated freeze-thaw. |
| Saliva | 50 - 200 | Not Applicable | Not Applicable | Centrifuge at >10,000g to remove mucins, use protease inhibitors. |
Detailed Protocols for Sample Preparation Pre-ELISA
Plasma Collection & Processing for Low-Abundance Cytokines
Objective: To obtain platelet-poor plasma minimizing in vitro activation and degradation.
- Venipuncture: Draw blood into pre-chilled vacutainer containing K2EDTA.
- Immediate Processing: Keep tubes on wet ice and centrifuge within 30 minutes at 2,000 × g for 15 minutes at 4°C.
- Plasma Harvesting: Carefully aspirate the upper plasma layer, avoiding the buffy coat and platelet layer.
- Secondary Clearance: For ultra-sensitive assays, perform a second centrifugation at 10,000 × g for 10 minutes at 4°C to remove residual platelets and vesicles.
- Aliquoting & Storage: Aliquot supernatant into low-protein-binding tubes. Flash-freeze in liquid nitrogen and store at -80°C.
Serum Preparation for Hormone Assay
Objective: To obtain serum free of fibrin and cellular components.
- Clot Formation: Draw blood into serum separator tube (SST). Invert 5 times. Incubate upright at room temperature for 30 minutes for complete clot formation.
- Clot Retraction: Loosen the clot from tube walls using a sterile applicator stick.
- Centrifugation: Spin at 1,500-2,000 × g for 15 minutes at room temperature.
- Harvesting: Transfer the clear serum to a fresh tube, avoiding any cellular material or gel separator.
- Storage: Aliquot and freeze at -80°C.
CSF Handling for Neurological Biomarkers
Objective: To preserve labile, low-concentration analytes.
- Lumbar Puncture: Collect CSF into sterile polypropylene tubes (avoid polystyrene).
- Immediate Processing: Centrifuge at 400 × g for 10 minutes at 4°C to pellet any cellular contaminants.
- Aliquoting: Transfer the supernatant to multiple low-binding microtubes (to avoid repeated freeze-thaw).
- Storage: Flash-freeze within 1 hour of collection. Store at -80°C. Note: Never store at -20°C.
Saliva Collection for Cortisol ELISA
Objective: To obtain clean, cell-free saliva.
- Passive Drool: Subjects refrain from eating, drinking, or brushing teeth for at least 60 minutes prior. Saliva is allowed to pool in the mouth and is deposited directly into a pre-chilled polypropylene collection vial via a short straw.
- De-viscosing & Clarification: Centrifuge at 15,000 × g for 20 minutes at 4°C.
- Collection: Carefully collect the clear, viscous supernatant, leaving behind the pellet of cells, debris, and mucins.
- Stabilization: Add a broad-spectrum protease inhibitor cocktail (1:100 v/v).
- Storage: Aliquot and freeze at -80°C.
The Scientist's Toolkit: Essential Reagent Solutions
Table 3: Key Research Reagent Solutions for Matrix Management in ELISA
| Reagent / Material | Function & Rationale |
|---|---|
| Low-Protein-Binding Tubes (e.g., Polypropylene) | Minimizes adsorptive loss of low-abundance protein biomarkers to container walls. |
| Protease Inhibitor Cocktail (Broad Spectrum) | Halts enzymatic degradation of protein/peptide biomarkers during sample processing and storage. Critical for plasma, serum, and saliva. |
| Phosphatase Inhibitors | Preserves phosphorylation states of signaling biomarkers (e.g., phospho-tau in CSF). |
| Blocking Buffers with Heterologous Proteins (e.g., Casein, BSA in PBS) | Reduces non-specific binding in ELISA wells, crucial for complex matrices like plasma/serum. |
| Matrix Interference Removal Beads (e.g., STRATEGY, MARS Spin Columns) | Immunoaffinity depletion of high-abundance proteins (albumin, IgG) to improve detection of low-abundance targets. |
| Lipid Removal Agents (e.g., LipidURE) | Precipitates lipoproteins and lipids from samples, reducing turbidity and non-specific interference in colorimetric/fluorometric assays. |
| Stabilizing Agents for Labile Analytes (e.g., Aprotonin, DTT) | Specifically inhibits serine proteases (Aprotonin) or prevents oxidation of thiol groups (DTT). |
| Synthetic Surfactants (e.g., CHAPS, Tween-20) | Added to assay buffers to minimize hydrophobic interactions and reduce background signal. |
Visualizations
Generic Workflow for Biomarker ELISA Across Biological Fluids
Common Matrix Interferents in Plasma and Serum ELISA
Advanced ELISA Protocols for Enhanced Sensitivity and Specificity
The reliable detection of low-abundance metabolic biomarkers in complex biological matrices remains a formidable challenge in clinical proteomics and metabolomics. This whitepaper details the critical pre-analytical strategies—concentration, depletion, and clean-up—that are foundational to successful ELISA-based quantification. By enhancing the signal-to-noise ratio and mitigating matrix effects, these preparatory steps are indispensable for achieving the sensitivity and specificity required for research and drug development targeting elusive biomarkers.
Enzyme-Linked Immunosorbent Assay (ELISA) is a cornerstone technique for quantifying protein biomarkers. However, its application to low-abundance metabolic biomarkers (e.g., cytokines, signaling peptides, modified proteins in serum, plasma, or urine) is often confounded by their low concentration relative to high- and medium-abundance proteins, and the presence of interfering substances. The pre-analytical phase, encompassing all steps from sample collection to assay loading, is a major source of variability. Strategic sample preparation is not merely beneficial but essential to enrich target analytes and remove contaminants that cause nonspecific binding, signal suppression, or false positives.
Core Strategies: Principles and Applications
Concentration
Concentration increases the absolute amount of target analyte per unit volume, pushing it above the assay's limit of detection (LoD).
Key Techniques:
- Ultrafiltration: Uses centrifugal force to pass solvents and low-molecular-weight solutes through a semi-permeable membrane, retaining proteins above a specified Molecular Weight Cut-Off (MWCO).
- Lyophilization (Freeze-Drying): Removes water via sublimation under vacuum, concentrating all non-volatile solutes. Often requires subsequent reconstitution in a smaller volume.
- Precipitation: Proteins are precipitated using agents like acetone, chloroform/methanol, or trichloroacetic acid (TCA), then pelleted and resolubilized in a smaller buffer volume.
Considerations: Concentration can co-concentrate interfering substances and may alter the sample matrix, affecting assay kinetics.
Depletion
Depletion removes highly abundant, "uninteresting" proteins (e.g., albumin, immunoglobulins) that constitute ~90% of serum/plasma proteome, thereby reducing dynamic range and uncovering lower-abundance species.
Key Techniques:
- Immunoaffinity Depletion: Columns or spin devices with immobilized antibodies (e.g., anti-HSA, anti-IgG) selectively bind and remove specific high-abundance proteins.
- Combinatorial Peptide Ligand Libraries (CPLL): A library of hexapeptides bound to beads interacts with diverse proteins, normalizing concentrations by saturating high-abundance proteins and enriching low-abundance ones.
Considerations: Risk of nonspecific binding and removal of target analytes that interact with abundant proteins (the "albuminome" effect). High cost for immunoaffinity methods.
Clean-Up
Clean-up removes specific interfering substances such as lipids, salts, detergents, or particulates that can interfere with antibody binding or generate background noise.
Key Techniques:
- Solid-Phase Extraction (SPE): Sample is passed through a cartridge with a stationary phase (C18, ion-exchange, mixed-mode) that selectively retains either the target or the contaminants.
- Dialysis: Removes salts and small molecules via diffusion across a semi-permeable membrane into a buffer.
- Lipid Removal Agents: Use of adsorbents or organic solvent washes to eliminate lipemic interference.
Considerations: Each clean-up step adds complexity and potential for analyte loss. Method must be tailored to the specific interference and sample type.
Quantitative Data Comparison of Techniques
Table 1: Performance Metrics of Common Pre-Analytical Techniques
| Technique | Primary Goal | Typical Sample Recovery (%) | Fold-Enrichment (Typical Range) | Key Limitation |
|---|---|---|---|---|
| Ultrafiltration (10kDa MWCO) | Concentration | 70-90 | 5-20x | Membrane fouling; loss of low MW targets |
| Acetone Precipitation | Concentration/Clean-up | 60-85 | 5-15x | Incomplete resolubilization; protein aggregation |
| Immunoaffinity Depletion (MARS-14) | Depletion | >95 (for low-abundance) | 10-50x (dynamic range improvement) | High cost; potential co-depletion of bound biomarkers |
| CPLL Treatment | Depletion/Enrichment | Variable (normalization) | Up to 1000x for very low-abundance | Complex protocol; requires extensive optimization |
| C18 SPE | Clean-up/Concentration | 80-95 | 5-100x (analyte-dependent) | May retain hydrophobic targets too strongly |
| Dialysis (10kDa MWCO) | Desalting/Clean-up | 85-95 | Minimal (volume may change) | Dilution factor; time-consuming |
Table 2: Impact of Sample Prep on ELISA Performance for a Hypothetical Low-Abundance Cytokine (Theoretical Data)
| Preparation Strategy | Apparent Concentration (pg/mL) | Intra-Assay CV (%) | Inter-Assay CV (%) | Signal/Background Ratio | Comment |
|---|---|---|---|---|---|
| None (Raw Plasma) | Below LoD | N/A | N/A | < 2 | Target masked by matrix |
| 2x Ultrafiltration | 15.2 | 12.5 | 18.7 | 5.1 | Detected but high variance |
| Abundant Protein Depletion + 5x UF | 48.6 | 7.2 | 10.3 | 12.8 | Optimal for quantification |
| Protein Precipitation | 22.1 | 15.8 | 22.1 | 6.5 | Improved detection but poor precision |
Detailed Experimental Protocols
Protocol 4.1: Immunoaffinity Depletion of Human Serum Using a Spin Column Format
Objective: Remove the top 14 abundant proteins from 20 µL of human serum prior to ELISA for a low-abundance metabolic biomarker.
Materials:
- Commercial 14-protein depletion spin column (e.g., ProteoPrep or MARS Spin Column).
- Phosphate-Buffered Saline (PBS), pH 7.4.
- Low-protein binding microcentrifuge tubes.
- Refrigerated microcentrifuge.
Procedure:
- Equilibrate the spin column by adding 200 µL of PBS and centrifuging at 1000 x g for 1 minute at 4°C. Discard flow-through.
- Load 20 µL of thawed, clarified serum onto the center of the resin bed.
- Incubate the column for 10 minutes at room temperature without centrifugation.
- Place column in a clean collection tube and centrifuge at 1000 x g for 2 minutes at 4°C. Retain the flow-through as the depleted serum.
- For maximum recovery, wash the column by adding 100 µL of PBS and centrifuging again at 1000 x g for 2 minutes. Pool this wash with the initial flow-through.
- The depleted sample can now be quantified for total protein and subjected to concentration or directly analyzed by ELISA with appropriate matrix-matched calibrators.
Protocol 4.2: Concentration and Desalting via Ultrafiltration
Objective: Concentrate a diluted urine sample 10-fold and exchange buffer into ELISA assay buffer.
Materials:
- Ultrafiltration device (e.g., Amicon Ultra, 10 kDa MWCO, 0.5 mL).
- ELISA assay buffer (provided with kit or 1% BSA in PBS).
- Refrigerated microcentrifuge.
Procedure:
- Load up to 500 µL of clarified urine sample into the ultrafiltration device reservoir.
- Centrifuge at 14,000 x g at 4°C until the retentate volume is approximately 50 µL (typically 15-20 minutes).
- Buffer Exchange: Add 450 µL of ELISA assay buffer to the retentate, bringing the volume back to ~500 µL. Centrifuge again to 50 µL. Repeat this step once.
- Recover the concentrated retentate (~50 µL) by inverting the device into a fresh collection tube and centrifuging at 1000 x g for 2 minutes.
- The sample is now ready for ELISA. The final concentration factor is approximately 10x.
Visualizations: Workflows and Pathways
Title: Sample Preparation Workflow for Biomarker ELISA
Title: Matrix Interference & Prep Strategy Impact
The Scientist's Toolkit: Essential Research Reagent Solutions
Table 3: Key Reagents and Materials for Pre-Analytical Preparation
| Item | Function/Principle | Key Considerations for Low-Abundance Biomarkers |
|---|---|---|
| Immunoaffinity Depletion Columns (e.g., MARS, ProteoPrep, Seppro) | Selective removal of top 6-20 abundant plasma proteins via immobilized antibodies. | Choose breadth (e.g., top 14 vs. top 2) based on required dynamic range improvement vs. cost and potential target loss. |
| Ultrafiltration Devices (e.g., Amicon Ultra, Vivaspin) | Concentration and buffer exchange based on molecular weight cut-off (MWCO). | Select MWCO well below target molecular weight. Use low-binding regenerated cellulose membranes to minimize adsorption. |
| Combinatorial Peptide Ligand Library (CPLL) Beads (e.g., ProteoMiner) | Equalize protein concentrations by saturation binding, enriching low-abundance species. | Requires careful optimization of binding/washing conditions. Followed by elution for downstream analysis. |
| Solid-Phase Extraction (SPE) Cartridges (C18, HLB, Mixed-Mode) | Remove salts, lipids, and other interferents; can also concentrate. | Select phase chemistry compatible with target analyte hydrophobicity/charge. Pre-condition with appropriate solvents. |
| Protease & Phosphatase Inhibitor Cocktails | Preserve sample integrity by preventing protein degradation and dephosphorylation. | Critical. Must be added at collection. Use broad-spectrum, compatible with downstream assays. |
| Mass Spectrometry-Grade Water & Solvents | Provide ultra-pure reagents for all dilution and reconstitution steps. | Minimizes introduction of contaminants that cause high background in sensitive detection systems. |
| Low-Protein Binding Tubes & Tips | Minimize adsorptive loss of target protein to plastic surfaces. | Essential for handling samples after depletion/concentration when target levels are critically low. |
| Matrix-Matched Calibrators & Controls | Provide calibration standards in a background similar to the prepared sample. | Non-negotiable. ELISA standard curve must be prepared in depleted/concentrated matrix to correct for residual matrix effects. |
The detection of low-abundance metabolic biomarkers (e.g., hormones, cytokines, signaling peptides) in complex biological fluids like serum, plasma, or cerebrospinal fluid presents a significant analytical challenge in modern biomedical research. Traditional colorimetric enzyme-linked immunosorbent assays (ELISAs) often lack the sensitivity and dynamic range required for quantifying analytes present at sub-picogram per milliliter (pg/mL) concentrations. This limitation directly impacts studies on early disease pathogenesis, drug pharmacodynamics, and biomarker validation. In the context of a thesis focused on ELISA methodologies for such applications, this guide details two advanced, high-sensitivity formats: Chemiluminescence Immunoassay (CLIA) and Electrochemiluminescence Immunoassay (ECL).
Core Principles and Comparative Analysis
Chemiluminescence Immunoassay (CLIA)
CLIA replaces the chromogenic substrate of a conventional ELISA with a chemiluminescent substrate. The enzymatic reaction (typically catalyzed by Horseradish Peroxidase - HRP or Alkaline Phosphatase - ALP) produces light as a direct product. Common substrates include luminol/H₂O₂ (for HRP) and dioxetane derivatives (for ALP). The emitted photons are quantified using a luminometer. The key advantage is a higher signal-to-noise ratio compared to colorimetric detection, as there is no background from sample turbidity or color.
Electrochemiluminescence Immunoassay (ECL)
ECL, exemplified by Meso Scale Discovery (MSD) and Roche Elecsys platforms, is a more advanced technique. It utilizes labels, most commonly Ruthenium(II) tris-bipyridine [Ru(bpy)₃²⁺] derivatives, which undergo an electrochemical reaction at the surface of an electrode (working electrode). Upon application of a specific voltage, a cyclical redox reaction occurs in the presence of a co-reactant (tripropylamine - TPA), generating an excited state of the Ru complex. The return to the ground state emits a photon at ~620 nm. The electrochemical initiation localizes the signal generation to the electrode surface, further reducing background noise. Furthermore, ECL labels are stable, non-radioactive, and allow for multiplexing on patterned electrodes.
Quantitative Performance Comparison
Table 1: Comparative Performance Metrics of High-Sensitivity ELISA Formats
| Parameter | Colorimetric ELISA | Chemiluminescent Immunoassay (CLIA) | Electrochemiluminescent Immunoassay (ECL) |
|---|---|---|---|
| Typical Limit of Detection (LOD) | 1-10 pg/mL | 0.1-1 pg/mL | 0.01-0.1 pg/mL (or lower) |
| Dynamic Range | ~2 log10 | 3-5 log10 | 5-6 log10 |
| Assay Time (Typical) | 3-5 hours | 2-4 hours | 1-3 hours |
| Key Detection Mechanism | Enzymatic color change | Enzymatic light emission | Electrochemically triggered light emission |
| Common Label/Substrate | HRP/TMB, ALP/pNPP | HRP/Luminol, ALP/AMPPD | [Ru(bpy)₃²⁺] / TPA |
| Multiplexing Capability | Low (spectral overlap) | Moderate (sequential) | High (spatial/electrical) |
| Primary Noise Source | Sample absorbance/turbidity | Non-specific luminescence | Non-specific electrochemical reactions |
| Instrumentation | Plate reader (absorbance) | Luminometer | ECL plate reader with electrodes |
Detailed Experimental Protocols
Protocol: Sandwich CLIA for Serum Biomarker Quantification
Objective: To quantify a low-abundance cytokine (e.g., IL-6) in human serum.
Key Reagents & Materials:
- Coating Antibody: Capture anti-IL-6 monoclonal antibody.
- Detection Antibody: Biotinylated anti-IL-6 monoclonal antibody.
- Standard: Recombinant IL-6 protein in analyte-free matrix.
- Streptavidin-HRP Conjugate.
- Chemiluminescent Substrate: Enhanced luminol-based solution (e.g., containing H₂O₂ and enhancers).
- Wash Buffer: PBS with 0.05% Tween-20.
- Blocking Buffer: PBS with 1% BSA or 5% non-fat dry milk.
- White/opaque 96-well microplate.
Procedure:
- Coating: Dilute capture antibody to 2-5 µg/mL in carbonate/bicarbonate coating buffer (pH 9.6). Add 100 µL/well to a microplate. Seal and incubate overnight at 4°C.
- Washing: Aspirate wells and wash 3 times with >300 µL wash buffer using a plate washer or manual pipetting.
- Blocking: Add 200 µL/well of blocking buffer. Incubate for 1-2 hours at room temperature (RT) on a plate shaker. Wash 3 times.
- Sample & Standard Addition: Add 100 µL/well of serum samples (diluted if necessary) and IL-6 standards in duplicate. Include blank (matrix only) wells. Incubate for 2 hours at RT with shaking. Wash 5 times.
- Detection Antibody Incubation: Add 100 µL/well of biotinylated detection antibody (diluted per optimization). Incubate for 1-2 hours at RT with shaking. Wash 5 times.
- Streptavidin-HRP Incubation: Add 100 µL/well of streptavidin-HRP (typically 1:10,000 dilution). Incubate for 30-45 minutes at RT protected from light. Wash 5-7 times thoroughly.
- Signal Detection: Prepare chemiluminescent substrate according to manufacturer's instructions. Add 100 µL/well. Incubate for 2-5 minutes. Measure Relative Light Units (RLU) immediately in a plate-reading luminometer with integration time of 0.1-1 second/well.
- Data Analysis: Generate a 4- or 5-parameter logistic (4PL/5PL) standard curve using mean RLU vs. standard concentration. Interpolate sample concentrations from the curve.
Protocol: Multiplexed ECL Assay on an MSD Platform
Objective: To simultaneously quantify a panel of metabolic hormones (e.g., Insulin, Leptin, Ghrelin) in plasma.
Key Reagents & Materials:
- MSD MULTI-ARRAY or U-PLEX Plate pre-coated with capture antibodies.
- MSD 10-Spot MULTI-SPOT Plate.
- Detection Antibody: Sulfo-Tag labeled detection antibody cocktail.
- MSD GOLD Read Buffer B (contains TPA co-reactant).
- Wash Buffer: PBS with 0.05% Tween-20.
- Blocking/Diluent: MSD Blocker A solution or PBS with 1% BSA.
Procedure:
- Plate Blocking: Add 150 µL/well of Blocker A solution. Incubate for 30 minutes at RT with shaking.
- Washing: Decant and wash plate 3 times with wash buffer using a multichannel pipette or plate washer.
- Sample & Standard Addition: Add 25 µL/well of calibrators, controls, and plasma samples (diluted in appropriate diluent). Incubate for 2 hours at RT with shaking.
- Washing: Wash plate 3 times with wash buffer.
- Detection Antibody Incubation: Add 25 µL/well of the Sulfo-Tag labeled detection antibody mixture. Incubate for 1-2 hours at RT with shaking.
- Washing: Wash plate 3 times with wash buffer.
- Signal Detection: Add 150 µL/well of MSD GOLD Read Buffer. Wait 2 minutes. Read the plate immediately on an MSD MESO QuickPlex SQ 120 or SECTOR Imager instrument. The reader applies a voltage to each well, inducing ECL.
- Data Analysis: Use the MSD Discovery Workbench software. The instrument software automatically generates individual standard curves for each analyte in each multiplexed spot and reports sample concentrations.
Signaling Pathways and Workflow Visualizations
Title: Chemiluminescent Immunoassay (CLIA) Step-by-Step Workflow
Title: Electrochemiluminescence (ECL) Core Reaction Mechanism
Title: Evolution of ELISA Sensitivity from Colorimetric to ECL
The Scientist's Toolkit: Essential Research Reagent Solutions
Table 2: Key Reagents and Materials for High-Sensitivity Immunoassays
| Item | Primary Function | Example/Critical Note |
|---|---|---|
| High-Affinity Matched Antibody Pair | Specific capture and detection of the target analyte. | Critical for sensitivity. Monoclonal/monoclonal or monoclonal/polyclonal pairs preferred. Must be validated for lack of cross-reactivity. |
| Chemiluminescent Substrate | Enzymatic generation of light signal in CLIA. | HRP Systems: Enhanced luminol (e.g., SuperSignal). ALP Systems: CDP-Star, CSPD. Stability and enhancement chemicals are key. |
| ECL Label (Sulfo-Tag) | Electrochemiluminescent label for detection antibody in ECL. | Ruthenium chelate derivative (e.g., MSD Sulfo-Tag NHS Ester). Conjugated to detection antibodies via lysine residues. |
| ECL Co-reactant (TPA) | Coreagent in the electrochemical cycle to generate the excited state. | Supplied in the read buffer (e.g., MSD GOLD Read Buffer B). Optimized concentration is vital for stable light output. |
| Low-Binding Microplates | Minimize non-specific adsorption of reagents, especially critical for low pg/mL assays. | CLIA: White polystyrene plates. ECL: Specialty plates with integrated carbon electrodes (MSD, Roche). |
| Streptavidin-Biotin System | Signal amplification in CLIA and some ECL formats. | Streptavidin-enzyme (HRP) or Streptavidin-Sulfo-Tag conjugates provide uniform labeling and amplification. |
| Assay Diluent/Block Buffer | Reduce non-specific binding and matrix effects. | Protein-based (BSA, casein) blockers, often supplemented with surfactants, and matched to sample matrix (serum, plasma, CSF). |
| Precision Wash Buffer | Remove unbound material while maintaining assay integrity. | Typically PBS or Tris with 0.05-0.1% Tween-20. Automated plate washers provide superior consistency for high-sensitivity assays. |
The detection of low-abundance metabolic biomarkers in biological fluids (e.g., serum, plasma, cerebrospinal fluid) presents a significant analytical challenge in both research and clinical drug development. Traditional enzyme-linked immunosorbent assay (ELISA) formats often lack the requisite sensitivity for quantifying targets present at sub-picomolar concentrations. Signal amplification systems, therefore, are critical for pushing detection limits, improving signal-to-noise ratios, and enabling precise quantification. This technical guide focuses on Tyramide Signal Amplification (TSA, also known as CARD) and related enzyme-cascade techniques, framing their application within ELISA-based workflows for metabolic biomarker research.
Core Principles of Signal Amplification
Tyramide Signal Amplification (TSA)
TSA is a horseradish peroxidase (HRP)-mediated deposition technique. Activated tyramide substrates are converted locally into highly reactive intermediates that covalently bind to electron-rich residues (e.g., tyrosine) on nearby proteins. This results in the deposition of numerous labels (fluorophores, biotins, or haptens) at the site of the primary antibody, enabling substantial signal multiplication.
Other Enzyme Cascade Techniques
These systems leverage sequential enzymatic reactions to generate a localized, amplified product. Common pairs include:
- Alkaline Phosphatase (AP) with NADP/NAD⁺ cycling: AP generates NAD⁺ from NADP⁺, which drives a secondary dehydrogenase cycling reaction, producing a colored formazan.
- HRP with Glucose Oxidase (GOx) Cascades: HRP-generated products activate a secondary GOx reaction, producing hydrogen peroxide in situ for further HRP turnover.
- Hybrid Dual-Enzyme Systems: Combining orthogonal enzymes (e.g., AP and HRP) with chimeric substrates to minimize background.
Diagram: TSA-ELISA Workflow
Diagram Title: TSA-ELISA Step-by-Step Protocol
Diagram: Enzyme Cascade Amplification Logic
Diagram Title: Generalized Enzyme Cascade Amplification Pathway
Quantitative Comparison of Amplification Systems
Table 1: Performance Characteristics of Signal Amplification Systems in ELISA
| System | Core Mechanism | Typical Signal Amplification Factor (vs. Direct ELISA) | Limit of Detection (LOD) Improvement | Dynamic Range | Key Limitations |
|---|---|---|---|---|---|
| Direct/Standard ELISA | Single enzyme-antibody conjugate. | 1x (Baseline) | Baseline | 2-3 logs | Low sensitivity for rare analytes. |
| Tyramide (TSA) | HRP-activated covalent deposition of labels. | 10- to 100-fold | 10-100x lower | Can be compressed | Diffusion artifact risk; optimization critical. |
| Biotin-Streptavidin | Multi-layer biotin-streptavidin-enzyme stacking. | 5- to 10-fold | 5-10x lower | Maintained | High endogenous biotin in samples causes interference. |
| AP/NAD⁺ Cycling | Enzymatic cycling generating colored formazan. | 50- to 500-fold | 50-500x lower | Wide | Requires specific substrate system; longer development. |
| Dual-Enzyme Hybrid | Two orthogonal enzymes in sequence. | 20- to 200-fold | 20-200x lower | Maintained | Complex reagent development; potential cross-talk. |
Detailed Experimental Protocols
Protocol: TSA-amplified Fluorescent ELISA for Serum Biomarkers
Objective: Quantify sub-pg/mL level metabolic biomarker in human serum.
Materials: See "The Scientist's Toolkit" (Section 7).
Procedure:
- Plate Coating: Coat high-binding 96-well plate with 100 µL/well of capture antibody (2 µg/mL in PBS). Seal and incubate overnight at 4°C.
- Blocking: Aspirate, wash 3x with PBS + 0.05% Tween-20 (PBST). Block with 300 µL/well of Protein-Free Blocking Buffer for 2 hours at RT.
- Antigen & Sample Incubation: Wash 3x. Add 100 µL/well of calibrators (prepared in analyte-free serum) and test samples. Incubate for 2 hours at RT on an orbital shaker.
- Primary Antibody: Wash 5x. Add 100 µL/well of biotinylated detection antibody (0.5 µg/mL in Dilution Buffer). Incubate 1 hour at RT.
- Streptavidin-HRP: Wash 5x. Add 100 µL/well of Streptavidin-HRP (1:5000 dilution). Incubate 30 minutes at RT, protected from light.
- TSA Reaction: Wash 5x thoroughly. Prepare Tyramide-Fluorophore working solution per manufacturer's instructions (e.g., 1:50 dilution in Amplification Diluent). Add 100 µL/well, incubate for precisely 2-10 minutes (optimize). Stop reaction by washing 5x with PBST.
- Signal Readout: Read fluorescence intensity (e.g., Ex/Em 490/520 nm) on a microplate reader. Analyze using a 4- or 5-parameter logistic curve.
Protocol: AP/NAD⁺ Cycling Amplification (Colorimetric)
Objective: Amplify signal for low-abundance antigen in a traditional colorimetric ELISA.
Procedure (Steps 1-4 as standard ELISA with AP-conjugated secondary antibody):
- Primary AP Reaction: After final wash, add 100 µL/well of NADP⁺ substrate solution (e.g., 0.1 mM NADP⁺ in AP buffer). Incubate 30 min at RT.
- Enzyme Cycling: Without washing, add 100 µL/well of Cycling Mix containing: 0.1 M Tris-HCl (pH 8.0), 0.5 mM MTT (Tetrazolium), 0.2% Ethanol, 1 mM PMS, and 100 µg/mL Alcohol Dehydrogenase. Mix gently.
- Development & Stop: Incubate at RT for 30-60 min, monitoring color development. Stop reaction by adding 50 µL/well of 0.3 M HCl.
- Readout: Measure absorbance at 570 nm. The amount of formazan dye generated is proportional to the initial NAD⁺ produced by AP.
The Scientist's Toolkit: Essential Research Reagents
Table 2: Key Reagent Solutions for TSA and Enzyme Cascade ELISAs
| Item | Function in Experiment | Example Product/Catalog Number (for reference) |
|---|---|---|
| Tyramide Conjugates | Activated substrate for HRP-driven covalent deposition. Critical for TSA. | Alexa Fluor Tyramide SuperBoost Kits; PerkinElmer Opal TSA Reagents. |
| High-Sensitivity Streptavidin-HRP | High-activity conjugate for efficient biotin detection prior to TSA step. | Thermo Fisher Scientific, Pierce High Sensitivity Streptavidin-HRP (21130). |
| Protein-Free Blocking Buffer | Minimizes non-specific binding without introducing exogenous biotin or enzymes. | Thermo Fisher Scientific, Protein-Free (PBS) Blocking Buffer (37572). |
| Amplification Diluent/Optimizer | Specialized buffer for TSA reaction to control kinetics and diffusion. | Included in commercial TSA kits; often contains H₂O₂ and stabilizing agents. |
| NADP⁺ / NAD⁺ Substrates | Phosphorylated cofactor substrates for Alkaline Phosphatase in cycling assays. | Sigma-Aldrich, NADP⁺ Sodium Salt (N5755). |
| Tetrazolium Salts (MTT, INT) | Electron acceptors in cycling reactions, forming insoluble, colored formazan. | Sigma-Aldrich, MTT (M2128). |
| Phenazine Methosulfate (PMS) | Electron coupler in dehydrogenase cycling reactions. | Sigma-Aldrich, PMS (P9625). |
| Dehydrogenase Enzymes | Secondary cycling enzyme (e.g., Alcohol Dehydrogenase, Diaphorase). | Worthington Biochemical, Alcohol Dehydrogenase. |
| High-Binding Microplates | Ensure efficient antibody/antigen immobilization. | Corning Costar 9018, Nunc MaxiSorp. |
Antibody Pair Selection and Validation for Ultra-Sensitive Detection
Within the context of a broader thesis on Enzyme-Linked Immunosorbent Assay (ELISA) for low-abundance metabolic biomarkers in biological fluids, the selection and validation of antibody pairs emerges as the most critical determinant of assay success. The accurate quantification of analytes at femtomolar to picomolar concentrations in complex matrices like serum, plasma, or cerebrospinal fluid demands an orthogonal strategy that prioritizes affinity, specificity, and functional compatibility. This guide provides an in-depth technical framework for this process.
Foundational Principles: The Sandwich ELISA Imperative
For ultra-sensitive detection, the sandwich ELISA format is non-negotiable. It provides signal amplification and a dual specificity check, dramatically reducing background. The core principle hinges on a matched pair of antibodies binding to non-overlapping epitopes on the target analyte: a capture antibody immobilized on a solid phase and a detection antibody conjugated to a reporter enzyme.
Antibody Pair Selection Strategy
Source and Type Evaluation
The initial choice involves monoclonal (mAb) versus monoclonal, monoclonal versus polyclonal (pAb), or recombinant antibody fragments. For biomarker validation, the recommended gold standard is two high-affinity monoclonal antibodies targeting distinct epitopes.
Epitope Mapping and Pairing Compatibility
The paramount requirement is epitope non-interference. Antibodies must bind simultaneously.
Key Experimental Protocol: Epitope Binning via Bridging ELISA
- Objective: To determine if two antibodies bind to the same or different epitopes.
- Procedure:
- Coat a microplate with a purified antigen (or a candidate capture antibody).
- Block with a suitable protein-based buffer (e.g., 1% BSA in PBS).
- Add the first candidate antibody (Ab-1) and incubate.
- Wash.
- Add the second, biotinylated candidate antibody (Ab-2).
- Wash.
- Add streptavidin-HRP conjugate.
- Wash and develop with TMB substrate.
- Interpretation: A high signal indicates Ab-2 can bind despite Ab-1 being bound, suggesting distinct epitopes. A low signal suggests steric hindrance or identical epitope. This should be performed reciprocally.
Affinity and Kinetics Characterization
Surface Plasmon Resonance (SPR) or Bio-Layer Interferometry (BLI) are essential for quantifying affinity (KD) and association/dissociation rates (kon, koff). For capture antibodies, a slower koff is often more critical for efficient retention during washes.
Cross-Reactivity Assessment
Screen against a panel of related proteins (e.g., isoforms, family members, or precursors/fragments of the biomarker) to ensure specificity. Use both homologous proteins and the closest known interferents in the biological fluid.
Systematic Validation for Ultra-Sensitive Assays
Pairing Orientation and Conjugate Optimization
The optimal capture/detection orientation must be determined empirically. Antibody performance can differ dramatically based on its role. Conjugation of the detection antibody to enzymes like HRP or ALP must be optimized to maintain affinity and avoid over-labeling, which causes inactivation.
Key Experimental Protocol: Checkerboard Titration
- Objective: To determine the optimal working concentrations of the capture and detection antibody pair.
- Procedure:
- Coat a plate with a range of capture antibody concentrations (e.g., 0.5, 1, 2, 4 µg/mL) in duplicate columns.
- Block and wash.
- Prepare a dilution series of the target antigen at a concentration near the expected limit of detection (LoD) and a higher concentration.
- Add antigen to rows of the plate.
- Add a range of detection antibody concentrations (e.g., 0.1, 0.25, 0.5, 1 µg/mL) in a matrix pattern.
- Complete the assay with streptavidin-HRP/TMB if using biotinylated detection Ab.
- Interpretation: The optimal pair is the lowest concentration combination that yields the highest signal-to-noise (S/N) ratio for the low antigen concentration.
Critical Assay Performance Parameters
Validation against regulatory guidelines (e.g., ICH, CLSI) is required. Key quantitative parameters are summarized below.
Table 1: Ultra-Sensitive ELISA Validation Parameters & Target Criteria
| Parameter | Definition | Target for Ultra-Sensitive Assay |
|---|---|---|
| Limit of Blank (LoB) | Highest apparent analyte concentration in blank samples. | ≤ lowest calibrator point. |
| Limit of Detection (LoD) | Lowest analyte concentration distinguishable from LoB. (LoD = LoB + 1.645*(SD low concentration sample)). | Femtomolar (fM) range. |
| Limit of Quantification (LoQ) | Lowest concentration measurable with defined precision (CV ≤20%) and accuracy (±20% bias). | ≤ 2-5x LoD. |
| Dynamic Range | Range from LoQ to the upper limit of quantification (ULoQ). | ≥ 3 log10. |
| Intra-Assay Precision (CV) | Repeatability within a single plate/run. | ≤ 10% across range. |
| Inter-Assay Precision (CV) | Reproducibility across different runs, days, operators. | ≤ 15% across range. |
| Spike Recovery | Accuracy measured by spiking analyte into the biological matrix. | 80-120%. |
| Parallelism | Linear dilution of a high-concentration native sample matches the calibrator curve. | % recovery within 70-130% per dilution. |
Matrix Effect Mitigation
Biological fluids contain interferents (heterophilic antibodies, complement, lipids, etc.). Strategies include:
- Use of heterophilic blocking reagents.
- Sample dilution in a specialized assay buffer.
- Employing F(ab')2 fragments as antibodies to avoid Fc receptor interactions.
- Use of a non-mammary-derived blocker (e.g., casein, fish gelatin).
The Scientist's Toolkit: Research Reagent Solutions
Table 2: Essential Reagents for Ultra-Sensitive Sandwich ELISA Development
| Item | Function & Rationale |
|---|---|
| High-Purity, Well-Characterized Antigen | Gold standard for calibration curve generation and antibody screening. Recombinant protein with confirmed structure/activity is ideal. |
| Monoclonal Antibody Pair (Matched) | Provides specificity, consistency, and unlimited supply. Critical for reproducible biomarker measurement. |
| Streptavidin-Biotin Amplification System | Biotinylated detection antibody paired with Streptavidin-poly-HRP conjugates significantly amplifies signal versus direct HRP conjugation. |
| High-Binding, Low-Noise Microplates | Plates with consistent, high protein binding capacity (e.g., Nunc MaxiSorp) minimize well-to-well variability. |
| Chemiluminescent Substrate | Offers higher sensitivity (10-100x) than colorimetric (TMB) substrates. Stable light emission allows for delayed reading. |
| Blocking Buffer (Commercial/Formulated) | Specialized buffers (e.g., containing casein, proprietary polymers) reduce nonspecific binding and matrix effects more effectively than standard BSA. |
| Heterophilic Blocking Reagent (HBR) | A cocktail of immunoglobulins and inert proteins that minimizes false positives caused by human anti-animal antibodies (HAAA) or rheumatoid factors. |
| Signal Readout (Luminometer) | Instrument capable of measuring luminescence with a wide dynamic range and high sensitivity. |
Workflow and Pathway Visualizations
Ultra-Sensitive Antibody Pair Development Workflow
Sandwich ELISA with Signal Amplification
Challenges & Solutions in Ultra-Sensitive ELISA
This technical whitepaper explores the critical application of Enzyme-Linked Immunosorbent Assay (ELISA) in the detection of low-abundance metabolic biomarkers within a thesis framework focused on biological fluids research. As the demand for early diagnosis and therapeutic monitoring intensifies, the precise quantification of minute analyte concentrations in serum, plasma, cerebrospinal fluid (CSF), and urine becomes paramount. This guide presents in-depth case studies across three complex disease spectrums, detailing advanced ELISA protocols, data interpretation, and essential research tools.
Case Study 1: Metabolic Syndrome – Adiponectin and Fetuin-A
Background: In Metabolic Syndrome (MetS), dysregulated adipose tissue secretes key signaling adipokines and hepatokines. Adiponectin (anti-inflammatory) and Fetuin-A (pro-inflammatory, insulin resistance inducer) are pivotal low-abundance biomarkers for assessing cardiometabolic risk.
Detailed Experimental Protocol for Multiplex Adipokine Detection
- Sample Preparation: Collect human EDTA-plasma. Centrifuge at 1000 × g for 15 minutes at 4°C. Aliquot and store at -80°C. Avoid repeated freeze-thaw cycles. Dilute samples 1:500 in the provided assay diluent immediately before use.
- Assay Principle: Use a validated, commercially available multiplex sandwich ELISA kit for simultaneous quantification.
- Procedure:
- Pre-wet each well of the antibody-coated microplate with 50 µL wash buffer.
- Add 50 µL of standard, control, or diluted sample per well in duplicate.
- Add 50 µL of the biotinylated detection antibody cocktail. Seal and incubate for 2 hours at room temperature (RT) on a horizontal orbital microplate shaker (500 rpm).
- Aspirate and wash each well 4 times with 300 µL wash buffer.
- Add 100 µL of Streptavidin-HRP conjugate. Incubate for 30 minutes at RT on the shaker.
- Aspirate and wash 4 times.
- Add 100 µL of TMB substrate. Incubate for 15 minutes in the dark.
- Stop the reaction with 100 µL of 1M H2SO4.
- Read absorbance immediately at 450 nm with a 570 nm or 620 nm reference wavelength.
Key Quantitative Data Summary
Table 1: Biomarker Concentrations in Metabolic Syndrome vs. Healthy Controls
| Biomarker | Healthy Control (Mean ± SD) | Metabolic Syndrome (Mean ± SD) | Sample Matrix | Assay Sensitivity |
|---|---|---|---|---|
| Adiponectin | 12.5 ± 3.2 µg/mL | 5.8 ± 1.7 µg/mL | Human Plasma | 0.1 ng/mL |
| Fetuin-A | 0.35 ± 0.08 g/L | 0.62 ± 0.15 g/L | Human Serum | 2.0 ng/mL |
Diagram 1: Key signaling pathways in metabolic syndrome biomarker crosstalk.
Case Study 2: Cancer – PD-L1 and ctDNA-Associated Proteins
Background: Liquid biopsy for cancer relies on ultra-sensitive detection of tumor-derived markers like soluble Programmed Death-Ligand 1 (sPD-L1) and mutant proteins associated with circulating tumor DNA (ctDNA). These biomarkers, present at femtogram to picogram levels, are crucial for immunotherapeutic monitoring.
Detailed Protocol for Ultrasensitive sPD-L1 ELISA
- Sample Preparation: Use human serum. Clarify by centrifugation at 10,000 × g for 10 minutes. Use within 4 hours or store at -80°C. Test undiluted and at a 1:2 dilution.
- Assay Principle: Digital ELISA (Simoa-based or equivalent) employing single-molecule array technology.
- Procedure:
- Step 1: Immunocomplex Formation: Incubate 100 µL of sample with 25 µL of anti-PD-L1 antibody-conjugated magnetic beads and 25 µL of biotinylated anti-PD-L1 detection antibody in a reaction vial for 1 hour at RT with vigorous shaking.
- Step 2: Bead Washing: Transfer the bead mixture to a filter plate. Wash 3x with 200 µL wash buffer using a magnetic washer.
- Step 3: Enzyme Labeling: Resuspend beads in 100 µL of Streptavidin-β-galactosidase (SβG) conjugate. Incubate for 20 minutes. Wash again 3x.
- Step 4: Detection: Resuspend beads in 25 µL of fluorogenic substrate (Resorufin β-D-galactopyranoside). Load into an array disc containing femtoliter-sized wells.
- Step 5: Imaging & Analysis: Seal the disc and image fluorescent wells (corresponding to single enzyme-labeled immunocomplexes) using a high-resolution fluorescence microscope. Concentration is calculated based on the average number of enzymes per bead (AEB) from the digital count.
Key Quantitative Data Summary
Table 2: Ultrasensitive Detection of Cancer Biomarkers in Serum
| Biomarker | Cancer Type | Patient Cohort Level (Median) | Healthy Donor Level (Median) | Technology | LOD |
|---|---|---|---|---|---|
| sPD-L1 | Non-Small Cell Lung Cancer | 125.4 pg/mL | 15.2 pg/mL | Digital ELISA | 0.05 pg/mL |
| Mutant p53 | High-Grade Serous Ovarian | 0.02 fM | Not Detected | Immuno-PCR | 5 aM |
Diagram 2: Workflow for ultrasensitive cancer biomarker analysis from liquid biopsy.
Case Study 3: Neurodegenerative Disease – Phospho-Tau and α-Synuclein
Background: CSF is the primary matrix for neurodegenerative biomarker research. Phosphorylated Tau (p-Tau181) and oligomeric α-Synuclein (α-Syn) are low-abundance species critical for distinguishing Alzheimer's disease (AD) and Lewy body disorders.
Detailed Protocol for CSF p-Tau181 Sandwich ELISA
- CSF Handling: Collect CSF via lumbar puncture. Centrifuge at 2000 × g for 10 minutes at 4°C to remove cells. Aliquot into polypropylene tubes. Store at -80°C. Thaw on ice and centrifuge briefly before use. Do not dilute.
- Assay Principle: Commercial high-sensitivity sandwich ELISA using monoclonal capture (anti-Tau) and detection (anti-pTau181) antibodies.
- Procedure:
- Add 100 µL of CSF or standard per well of the pre-coated plate. Incubate overnight at 4°C without shaking.
- Wash 6 times with 300 µL wash buffer.
- Add 100 µL of detection antibody (HRP-conjugated). Incubate for 1 hour at RT on a shaker.
- Wash 6 times.
- Add 100 µL TMB. Incubate for exactly 30 minutes in the dark.
- Stop with 100 µL stop solution.
- Read at 450 nm (reference 620 nm). Use a 4- or 5-parameter logistic curve fit.
Key Quantitative Data Summary
Table 3: Neurodegenerative Biomarker Levels in Cerebrospinal Fluid
| Biomarker | Disease Cohort | Concentration (Mean pg/mL) | Control (Mean pg/mL) | AUC (vs. Control) | Assay Dynamic Range |
|---|---|---|---|---|---|
| p-Tau181 | Alzheimer's Disease | 95.2 | 19.8 | 0.96 | 3.0-250 pg/mL |
| Oligomeric α-Syn | Parkinson's Disease | 45.6 | 12.1 | 0.89 | 15-2000 pg/mL |
Diagram 3: CSF biomarker pathway for neurodegenerative disease diagnosis.
The Scientist's Toolkit: Research Reagent Solutions
Table 4: Essential Materials for Low-Abundance Biomarker ELISA
| Item | Function & Critical Consideration |
|---|---|
| High-Affinity, Monoclonal Antibody Pair | Ensures specific capture and detection of the target epitope. Low cross-reactivity is non-negotiable for complex matrices. |
| Stable, Low-Background Signal Generation System | e.g., HRP/TMB with optimized enhancers, or enzymatic systems for digital ELISA (SβG). Must maximize signal-to-noise ratio. |
| Matrix-Matched Calibrators & Controls | Calibrators prepared in analyte-free artificial matrix mimicking the sample (e.g., stripped serum, artificial CSF) are essential for accurate quantification. |
| Low-Binding Microplates/Tubes | Minimizes non-specific adsorption of low-concentration analytes to plastic surfaces, improving recovery. |
| Precision Liquid Handling Equipment | Certified pipettes and automated washers are critical for reproducibility, especially with small sample volumes. |
| Validated Sample Diluent | Contains blockers (e.g., proteins, heterophilic blocking reagents) to mitigate matrix interference and stabilize the analyte. |
Automation and High-Throughput Considerations for Large-Scale Studies
The reliable detection of low-abundance metabolic biomarkers in biological fluids, such as plasma, serum, or cerebrospinal fluid, is a cornerstone of modern diagnostics and therapeutic development. Enzyme-Linked Immunosorbent Assay (ELISA) remains a gold-standard technique due to its specificity and sensitivity. However, large-scale studies, such as population-level biomarker validation or high-throughput drug screening, present formidable challenges in reproducibility, throughput, and data integrity. This whitepaper provides an in-depth technical guide on integrating automation and high-throughput (HT) methodologies into ELISA-based workflows for the precise quantification of low-abundance analytes, framed within the broader thesis of advancing metabolic biomarker research.
Core Challenges in Scaling Low-Abundance Biomarker ELISA
Transitioning from manual, small-batch ELISA to large-scale automated workflows introduces specific technical hurdles:
- Pre-analytical Variability: Inconsistencies in sample collection, storage, and pre-processing are magnified at scale.
- Liquid Handling Precision: Sub-microliter pipetting accuracy is critical for low-abundance targets where reagent volumes are minimized.
- Assay Robustness: Minimizing inter- and intra-assay coefficient of variation (CV) across hundreds of plates.
- Data Management: Tracking thousands of samples, associated metadata, and raw optical density (OD) values.
- Cost and Time Efficiency: Balancing reagent costs, capital equipment investment, and analysis speed.
High-Throughput Automated ELISA Workflow
A fully integrated HT-ELISA pipeline merges discrete automation modules. The following diagram outlines the core logical workflow and system relationships.
Title: High-Throughput Automated ELISA System Workflow
Detailed Methodologies for Key Automated Protocols
Protocol: Automated Setup of a Duplex ELISA for Metabolic Biomarkers
- Objective: Simultaneously quantify two low-abundance metabolic biomarkers (e.g., Adiponectin and FGF-21) from a single serum sample aliquot.
- Materials: See "The Scientist's Toolkit" (Section 7).
- Pre-automation: Coat 384-well plates with capture antibodies overnight. Block with assay diluent.
- Automated Steps (Performed by ALH & Dispenser):
- Sample/Standard Addition: Using a 16-channel pipette head, transfer 20 µL of pre-diluted serum (1:2 in assay diluent) or standard curve points (in triplicate) to designated wells.
- Incubation: Seal plate, incubate on a heated microplate shaker (25°C, 600 rpm, 2 hours).
- Washing: Transfer plate to automated washer. Perform 5 washes with 50 µL/well of wash buffer with 30-second soaks between washes.
- Detection Antibody Addition: Dispense 20 µL/well of a biotinylated antibody cocktail (containing both target-specific antibodies).
- Incubation: Repeat step 2 (1 hour).
- Washing: Repeat step 3.
- Streptavidin-HRP Addition: Dispense 20 µL/well of streptavidin conjugated to horseradish peroxidase (SA-HRP).
- Incubation: Repeat step 2 (30 minutes, in dark).
- Washing: Repeat step 3.
- Substrate Addition: Dispense 25 µL/well of stabilized chromogenic TMB substrate.
- Stop & Read: After 15-minute development, dispense 25 µL/well of 2N H₂SO₄. Read absorbance at 450 nm and 570 nm (reference) within 30 minutes.
- Data Analysis: Use a 4- or 5-parameter logistic (4PL/5PL) curve fit generated by the plate reader software for each analyte, subtracting reference OD.
Protocol: Automated Sample Dilution and Reformating for Biobank Screening
- Objective: Prepare 1000+ biobank serum samples for a single-plex, low-abundance biomarker ELISA.
- Workflow: A liquid handler with a 96-tip head performs all steps in a 96-well deep-well polypropylene (DWP) "mother plate" before transferring to the assay plate.
- Sample Thaw: Thaw original samples in a controlled-temperature rack (4°C).
- Aliquot & Dilution: Aspirate 10 µL from each sample tube (via barcode tracking) and dispense into 190 µL of assay diluent in the DWP (1:20 dilution). Mix via 5 aspiration/dispense cycles.
- Further Dilution (if needed): For a final 1:100 assay dilution, transfer 40 µL from the first DWP to 160 µL of diluent in a second DWP.
- Reformatting: Transfer 25 µL from the final DWP to the corresponding wells of twelve 96-well (or three 384-well) assay plates pre-coated with capture antibody.
Quantitative Performance Metrics in Automated HT-ELISA
The success of automation is measured by key performance indicators (KPIs). The table below summarizes benchmark data from recent implementations.
Table 1: Performance Metrics Comparison: Manual vs. Automated HT-ELISA
| Metric | Manual ELISA (96-well) | Automated HT-ELISA (384-well) | Improvement Factor |
|---|---|---|---|
| Plates Processed per 8-Hour Shift | 4-6 | 20-30 | 5x |
| Sample Throughput (Samples/Shift) | 384-576 | 7,680-11,520 | 20x |
| Inter-Assay CV (for Low-Abundance Biomarker) | 10-15% | 6-9% | ~1.7x (Improved Precision) |
| Reagent Consumption per Sample | 100% (Baseline) | 60-70% | 30-40% Reduction |
| Hands-On Time per Plate | 3-4 hours | 0.5-1 hour | 4-6x Reduction |
| Pipetting Accuracy (CV for 5 µL dispense) | ~8% (Manual Pipette) | <2% (ALH) | 4x (Improved Accuracy) |
Signaling Pathways of Featured Metabolic Biomarkers
To contextualize the analytes in the described protocols, their core signaling mechanisms are diagrammed below.
Title: Signaling Pathways of Adiponectin and FGF-21 Biomarkers
The Scientist's Toolkit: Essential Research Reagent Solutions
Table 2: Key Reagents and Materials for Automated Low-Abundance Biomarker ELISA
| Item | Function & Rationale | Example/Note |
|---|---|---|
| High-Affinity, Monoclonal Antibody Pairs | Ensure specificity and sensitivity for low pg/mL detection. Critical for multiplexing. | Validate cross-reactivity in multiplex format. |
| Low-Protein Binding, Black 384-Well Plates | Minimize non-specific binding (NSB). Black plates reduce cross-talk in fluorescent detection variants. | Polypropylene or specially treated polystyrene. |
| Automation-Compatible, Stabilized TMB | Single-step, ready-to-use substrate with consistent kinetic properties for automated dispensing. | Eliminates need for fresh H₂O₂ preparation. |
| PCR-Free, Low-Viscosity Wash Buffer (10X) | Formulated to prevent clogging of automated washer probes. Low foam generation. | Contains surfactant (e.g., Tween-20) and preservative. |
| Precision Assay Diluent/Blocking Buffer | Optimized for target biomatrix (e.g., serum/plasma). Reduces background and matrix effects. | Often contains heterophilic blocking agents. |
| Biotinylated Detection Antibodies | Enables universal streptavidin-enzyme conjugate detection, simplifying multiplex assay design. | Degree of biotinylation must be optimized. |
| Stable, Lyophilized Biomarker Standards | Calibrators with known concentration in relevant matrix. Lot-to-lot consistency is vital for longitudinal studies. | Reconstitution stability is key. |
| Robotic-Friendly Plate Seals and Lids | Adhesive seals that withstand shaking and incubation without leaking or creating aerosols. | Pierceable seals for direct sampling by some ALHs. |
Solving Common Pitfalls: A Guide to Optimizing Low-Abundance ELISA Assays
Identifying and Mitigating Matrix Interference and Non-Specific Binding
The accurate quantification of low-abundance metabolic biomarkers in biological fluids (e.g., plasma, serum, urine, cerebrospinal fluid) via enzyme-linked immunosorbent assay (ELISA) is a cornerstone of modern translational research and drug development. However, the sensitivity and specificity of these assays are critically undermined by two pervasive technical challenges: matrix interference and non-specific binding (NSB). This guide provides an in-depth technical analysis of these phenomena, framed within the context of a broader thesis on optimizing ELISA for trace-level biomarker detection. Effective management of these issues is paramount for generating reproducible, clinically relevant data.
Matrix Interference
Matrix interference arises from the complex composition of biological samples, which can modulate the antibody-antigen interaction or the enzymatic detection signal.
- Hemolysis, Lipemia, and Icterus: Alter optical density, quench signals, or physically interfere.
- Heterophilic Antibodies and Human Anti-Animal Antibodies (HAAAs): Endogenous antibodies that bridge capture and detection antibodies, causing false-positive signals.
- Soluble Receptors and Binding Proteins: Compete with assay antibodies for the target analyte.
- Proteolytic Enzymes: Degrade assay antibodies or the target analyte.
- Cross-Reactive Substances: Structurally similar molecules that are recognized by the assay antibodies.
Non-Specific Binding (NSB)
NSB refers to the adsorption of assay components (e.g., proteins, antibodies) to surfaces other than the intended specific binding sites, leading to elevated background noise and reduced signal-to-noise ratio.
- Hydrophobic Interactions: Primary driver of protein adsorption to polystyrene plates.
- Electrostatic Interactions: Between charged protein residues and the plate surface.
- Inadequate Blocking: Failure to sativate all uncoated binding sites on the plate and other surfaces.
Experimental Protocols for Identification
Protocol for Spike-and-Recovery and Linearity-of-Dilution
Purpose: To diagnose and quantify matrix interference. Materials: Purified target analyte standard, pooled matrix sample (e.g., normal human plasma), assay buffer, dilution tubes. Procedure:
- Prepare a high-concentration stock of the purified analyte in assay buffer.
- Spike-and-Recovery: Spike the analyte into the matrix sample at low, mid, and high concentrations within the assay's dynamic range. Prepare parallel spikes in assay buffer (the "diluent" control).
- Linearity-of-Dilution: Create a serial dilution (e.g., 1:2, 1:4, 1:8, 1:16) of a native sample with a high endogenous analyte level, and a spiked sample, using the assay buffer as the diluent.
- Run all samples in the ELISA according to the standard protocol.
- Calculation: Recovery (%) = (Measured concentration in spiked matrix / Measured concentration in spiked buffer) x 100. Acceptance is typically 80-120%.
- Analysis: Plot the measured concentration of the diluted samples against the dilution factor. A linear plot indicates minimal interference; non-linearity indicates its presence.
Protocol for Heterophilic Antibody Interference Testing
Purpose: To confirm interference from HAAAs or heterophilic antibodies. Procedure:
- Run the suspect sample neat and with the addition of a commercial heterophilic blocking reagent (HBR) or a mixture of irrelevant animal IgG (e.g., mouse, goat).
- Incubate the sample with the blocking agent for 30-60 minutes prior to adding it to the ELISA plate.
- Compare the measured analyte concentration with and without blocking. A significant decrease (>20-30%) with blocking indicates positive interference.
Mitigation Strategies and Detailed Protocols
Sample Pre-Treatment
- Dilution: The simplest method. Use the matrix that gives optimal recovery in the linearity-of-dilution experiment. Validate the minimum required dilution (MRD).
- Solid-Phase Extraction (SPE): Removes phospholipids, salts, and other interferents.
- Protocol: Condition SPE cartridge (C18 or mixed-mode). Load sample. Wash with water/weak solvent. Elute analyte with organic solvent (e.g., methanol/acetonitrile). Dry down and reconstitute in assay buffer.
- Protein Precipitation: For removal of abundant proteins.
- Protocol: Mix sample with 2-3 volumes of cold acetonitrile or methanol. Vortex, centrifuge (10,000-15,000 x g, 10 min). Collect supernatant, evaporate, and reconstitute.
Assay Design and Reagent Optimization
- Use of Fragmented Antibodies: Employ F(ab')₂ or Fab fragments as detection antibodies to eliminate Fc-mediated NSB.
- Enhanced Blocking: Use a combination of blockers (e.g., 1% BSA + 5% normal serum from the same species as the detection antibody + 0.05% Tween-20). Incubate for 2 hours at room temperature or overnight at 4°C.
- Additive Inclusion:
- Protocol: Add polymers like polyvinylalcohol (PVA, 0.1-1%) or CHAPS (0.1-0.5%) to sample and antibody diluents. For heterophilic interference, include 10-100 µg/ml of irrelevant IgGs or a proprietary HBR in the buffer.
Data Presentation: Quantitative Comparison of Mitigation Strategies
Table 1: Efficacy of Sample Pre-Treatment Methods on Recovery of Spiked Analyte in Human Plasma
| Pre-Treatment Method | Analyte Recovery (%) | CV (%) | Key Interferent Removed | Complexity |
|---|---|---|---|---|
| None (Neat) | 65 | 15 | None | Low |
| 1:5 Dilution | 92 | 8 | Mild matrix effects | Low |
| Protein Precipitation (ACN) | 85 | 12 | Proteins, lipids | Medium |
| Mixed-Mode SPE | 98 | 5 | Phospholipids, ions, proteins | High |
Table 2: Impact of Blocking and Additive Strategies on Background Signal (OD450) and NSB
| Blocking/Anti-NSB Strategy | Background Signal (Mean OD) | NSB Reduction vs. Basic Block (%) | Recommended Application |
|---|---|---|---|
| 1% BSA Only | 0.25 | Baseline | General use, low interference |
| 1% BSA + 5% Normal Goat Serum | 0.18 | 28 | Polyclonal detection systems |
| 1% BSA + 1% Casein + 0.1% Tween-20 | 0.15 | 40 | High sensitivity assays |
| Above + 50 µg/ml Mouse IgG | 0.12 | 52 | Suspected heterophilic interference |
Visualization of Concepts and Workflows
Diagram 1: Sources of Interference Impacting ELISA Signal
Diagram 2: Decision Workflow for Troubleshooting Interference
The Scientist's Toolkit: Essential Research Reagents & Materials
Table 3: Key Reagent Solutions for Mitigating Interference and NSB
| Item | Function & Rationale | Example Product/Composition |
|---|---|---|
| Heterophilic Blocking Reagent (HBR) | Neutralizes human anti-mouse antibodies (HAMA) and other heterophilic interferents to prevent false positives. | Commercial cocktails (e.g., Scantibodies HBR, MAB33) or 50-100 µg/ml mouse/rat IgG. |
| Alternative Blocking Buffers | Saturates hydrophobic/charged sites on the plate more effectively than BSA alone to reduce NSB. | 1-5% Casein, 5-10% non-fat dry milk, or synthetic blockers like StartingBlock. |
| Protein Fragments | Eliminates Fc-mediated NSB by using antibodies lacking the Fc region. | F(ab')₂ or Fab fragments of detection antibodies. |
| Non-Ionic Detergents | Reduces hydrophobic interactions in wash and sample buffers, minimizing aggregate formation and NSB. | Tween-20 (0.05-0.1%), Triton X-100 (0.1%). |
| Polymer Additives | Occupies non-specific sites in solution, shielding the analyte and antibodies. | Polyvinylalcohol (PVA, 0.1%), Polyvinylpyrrolidone (PVP, 0.5-1%). |
| Solid-Phase Extraction (SPE) Cartridges | Purifies and concentrates analyte while removing phospholipids and other matrix interferents. | Mixed-mode (C18/SCX) or HLB cartridges for broad-spectrum cleanup. |
| Analyte-Free Matrix | Critical for preparing standard curve dilutions in matrix-matched assays to account for interference. | Charcoal-stripped or immunoaffinity-depleted plasma/serum. |
Strategies to Reduce High Background Noise and Improve Signal-to-Noise Ratio
Thesis Context: In the pursuit of quantifying low-abundance metabolic biomarkers (e.g., eicosanoids, steroid hormones, bile acids) in complex biological fluids (plasma, urine, CSF) via ELISA, achieving an optimal signal-to-noise ratio (SNR) is paramount. High background noise directly compromises assay sensitivity, specificity, and the reliable detection of biomarkers present in the picomolar to femtomolar range.
Background noise in ELISA originates from multiple sources, each requiring specific mitigation strategies.
- Non-Specific Binding (NSB): The primary contributor. Proteins in sample matrices adsorb to well surfaces, capture antibodies, or detection reagents.
- Matrix Interferences: Heterophilic antibodies, rheumatoid factors, complement, and endogenous enzymes in biological fluids can cause false-positive signals.
- Reagent Imperfections: Cross-reactivity of antibodies, suboptimal conjugation of enzymes to detection antibodies, and contaminating enzymes in buffer systems.
- Instrumentation Noise: Plate reader variability, including fluctuations in lamp intensity and photomultiplier tube sensitivity.
- Washing Inefficiency: Incomplete removal of unbound components leaves residual enzymatic activity.
Core Methodological Strategies for Noise Reduction
Sample Preparation and Matrix Management
| Strategy | Protocol Detail | Quantitative Impact on SNR (Typical) |
|---|---|---|
| Sample Dilution | Dilute sample in assay buffer or a compatible buffer (e.g., PBS with blockers). Perform a pre-assay matrix spike-and-recovery experiment to determine optimal dilution. | Can reduce background by 50-70%, but may dilute target biomarker below LOD. Optimal dilution often 1:2 to 1:10 for plasma. |
| Solid-Phase Extraction (SPE) | Use C18 or mixed-mode SPE columns. Condition with methanol, equilibrate with water/weak acid, load sample, wash with water/5-15% methanol, elute with 60-90% methanol/acetonitrile. Dry down and reconstitute in assay buffer. | Can improve SNR 3-5 fold by removing interfering lipids and highly abundant proteins. Recovery of target biomarker is critical (aim >80%). |
| Immunoaffinity Depletion | Use columns/magnetic beads conjugated with antibodies to remove top 1-14 abundant plasma proteins (e.g., albumin, IgG). | Reduces total protein load by ~95%, potentially doubling SNR for low-abundance targets. Risk of non-specific removal of biomarkers bound to carrier proteins. |
Assay Condition Optimization
| Strategy | Protocol Detail | Quantitative Impact on SNR (Typical) |
|---|---|---|
| Blocking Agent Selection | Compare blockers: 1% BSA, 5% non-fat dry milk, 1-5% normal serum (from species unrelated to detection antibodies), or commercial protein-free blockers. Block for 1-2 hours at RT or overnight at 4°C. | Specialty protein-free blockers can reduce background by 30-50% compared to traditional BSA/milk for some assays. |
| Detergent Optimization | Add non-ionic detergents (Tween-20, Triton X-100) to wash and incubation buffers. Titrate from 0.01% to 0.5% (v/v). | 0.05% Tween-20 is standard; increasing to 0.1-0.2% can reduce NSB by an additional 10-20% without affecting specific binding. |
| Enhanced Washing | Increase wash volume (300-350 µL/well vs. 200 µL), wash cycles (5-6x vs. 3-4x), and incorporate a soak step (30-60 seconds) post-wash buffer addition. | Can lower background optical density (OD) by 0.1-0.3 units, significantly improving low-signal precision. |
| Incubation Time/Temp | Test capture antibody and detection antibody incubations: 1h at 37°C, 2h at RT, or overnight at 4°C. Lower temps/longer times often favor specificity. | Overnight 4°C capture can improve SNR by up to 2x compared to 1h 37°C for some biomarkers. |
Signal Generation and Detection Refinement
| Strategy | Protocol Detail | Quantitative Impact on SNR (Typical) |
|---|---|---|
| Enzyme/Substrate Choice | Horseradish Peroxidase (HRP)/TMB is standard. For high background, consider Alkaline Phosphatase (AP)/pNPP, which is less susceptible to matrix interferences. Use high-sensitivity, low-background TMB formulations. | Low-background TMB can yield a blank OD of <0.05 vs. 0.1-0.15 for standard TMB. AP/pNPP may offer 20% lower background in problematic matrices. |
| Signal Amplification | Use biotin-streptavidin (SA) systems (e.g., biotinylated detection Ab + SA-HRP). SA has high affinity and allows multiple enzyme molecules per immune complex. | Can amplify signal 5-10 fold, effectively improving SNR. Requires stringent blocking with avidin/biotin to control new NSB sources. |
| Kinetic vs. Endpoint Read | Perform kinetic reading of TMB development (e.g., every 30-60 sec for 10-15 min) instead of single endpoint stop. Early linear phase readings often have better SNR. | Early kinetic reads (2-5 min) can yield 15-25% higher SNR than endpoint read after 10-20 min, where background also accumulates. |
Experimental Protocol: Comprehensive Low-Background ELISA
Target: Quantification of 12-HETE in human plasma.
Workflow:
Low-Background ELISA Workflow for Plasma Biomarkers
The Scientist's Toolkit: Key Reagent Solutions
| Item | Function & Rationale |
|---|---|
| Protein-Free Blocking Buffer | Reduces NSB without introducing heterologous proteins that can cross-react or bind assay components. Essential when using biotin/streptavidin systems. |
| High-Purity, Low-Cross-Reactivity Antibody Pairs | Monoclonal or affinity-purified polyclonal antibodies with minimal cross-reactivity to structurally similar metabolites are critical for specificity. |
| Low-Background TMB Substrate | Single-component, ready-to-use TMB formulations optimized for high signal and very low non-enzymatic oxidation (low blank OD). |
| Biotinylation Kit (Site-Specific) | Allows controlled conjugation of biotin to detection antibodies, preserving immunoreactivity and minimizing aggregation that causes NSB. |
| Streptavidin-Polymer-HRP Conjugate | Replaces traditional SA-HRP; multiple HRP molecules on a polymer backbone per biotin binding event, enhancing signal amplification. |
| Matrix-Matched Calibrator Diluent | A synthetic or stripped matrix that mimics the sample fluid (e.g., charcoal-stripped serum for plasma assays) for preparing the standard curve, improving parallelism. |
| Immunoaffinity Depletion Columns | For pre-assay removal of high-abundance plasma proteins (Albumin, IgG) to unmask low-abundance biomarkers and reduce NSB. |
| Stable, Low-Binding Microplates | Plates with high protein-binding capacity for coating, but engineered to minimize passive adsorption of other reagents during assay steps. |
Noise Source and Mitigation Strategy Relationships
Data Analysis and Validation for SNR Assessment
Calculate SNR for each assay run: SNR = (Mean Sample OD – Mean Blank OD) / Standard Deviation of Blank OD. A robust assay for low-abundance biomarkers should achieve an SNR > 3 for the lower limit of quantification (LLOQ). Validate using spike-and-recovery in the biological matrix (target 80-120%) and parallelism assays to confirm minimal matrix distortion of the standard curve.
Conclusion: A systematic, multi-pronged approach addressing sample, assay, and detection is essential to suppress background noise. For ELISA of metabolic biomarkers in biological fluids, integrating advanced sample cleanup, stringent blocking and washing, and optimized signal generation reagents is non-negotiable for achieving the high SNR required for reproducible and sensitive quantification.
Optimizing Blocking Buffers, Incubation Times, and Wash Stringency
Accurate quantification of low-abundance metabolic biomarkers in complex biological fluids (e.g., serum, plasma, cerebrospinal fluid) via ELISA presents a unique signal-to-noise challenge. Non-specific binding (NSB) can obscure the true signal, leading to poor sensitivity and unreliable data. This technical guide deconstructs three pillars of assay robustness—blocking, incubation, and washing—within the context of a thesis focused on achieving maximal sensitivity and specificity for trace-level analyses.
The Science of Blocking: Strategies and Formulations
Blocking buffers prevent NSB by saturating unoccupied sites on the solid phase. The optimal formulation is contingent on the sample matrix and biomarker properties.
Table 1: Comparative Analysis of Common Blocking Buffers
| Blocking Agent | Typical Concentration | Mechanism of Action | Best For | Potential Interference |
|---|---|---|---|---|
| BSA or Casein | 1-5% (w/v) | Inert protein adsorption; minimal cross-reactivity. | General use; phospholipid-binding assays. | Contaminating immunoglobulins or enzymes. |
| Non-Fat Dry Milk | 1-5% (w/v) | Complex mixture of caseins and whey proteins. | High-capacity blocking for serum samples. | Endogenous biotin and phosphatases. |
| Fish Skin Gelatin | 0.1-1% (w/v) | Low IgG cross-reactivity due to phylogenetic distance. | Minimizing background in mammalian samples. | May be less robust for high-avidity interactions. |
| Commercial Protein-Free | As per manufacturer | Synthetic polymers or amino acid mixtures. | Phospho-specific assays; avoiding animal proteins. | Can be buffer-specific; requires validation. |
| Serum/Serum Albumin | 1-10% (v/v) | Matches sample matrix, reducing differential blocking. | Competitive ELISAs or difficult matrices. | High background if not properly matched/absorbed. |
Experimental Protocol: Blocking Buffer Optimization
- Coat a 96-well plate with the capture antibody overnight at 4°C.
- Wash 3x with PBS + 0.05% Tween 20 (PBST).
- Aliquot different blocking buffers (Table 1) into separate wells. Incubate for 1 hour at room temperature (RT) or 37°C.
- Wash 3x with PBST.
- Add a sample matrix spiked with a known, low concentration of the target biomarker and a negative control (matrix only). Incubate.
- Proceed with standard detection. Calculate the signal-to-noise (S/N) ratio: (Mean Signal of Spiked Sample) / (Mean Signal of Negative Control). The buffer yielding the highest S/N is optimal.
Kinetic Principles of Incubation: Time and Temperature
Incubation times and temperatures dictate binding kinetics and equilibrium. For low-abundance targets, insufficient incubation leads to undersampling; excessive incubation increases NSB.
Experimental Protocol: Determining Optimal Capture Antibody Incubation
- Coat plates with capture antibody as standard.
- Block optimally.
- Apply a standard containing the target biomarker at a concentration near the assay's limit of detection (LoD).
- Incubate the sample for varying times (e.g., 30, 60, 90, 120 min) at two temperatures (RT and 37°C).
- Complete the assay. Plot the signal versus time for each temperature. The optimal time is at the beginning of the signal plateau, before NSB increases significantly. The optimal temperature provides the highest plateau signal.
Table 2: Impact of Incubation Parameters on Assay Metrics
| Parameter | Short/ Low Temp | Long/ High Temp | Optimization Goal |
|---|---|---|---|
| Antigen-Antibody Binding | Non-equilibrium, low signal. | May reach equilibrium, higher signal. | Maximize specific binding. Choose time/temp at ~90% of max specific signal. |
| Non-Specific Binding | Typically lower. | Increases over time, especially at 37°C. | Minimize NSB. Monitor negative control signal over time. |
| Assay Duration | Reduced throughput. | Increased turnaround time. | Balance sensitivity with practicality. |
| Biomarker Stability | Preserved. | May degrade, leading to signal loss. | Preserve analyte integrity. |
Wash Stringency: The Critical Step for Specificity
Washing removes unbound reagents. Stringency, controlled by detergent concentration, ionic strength, and wash volume/frequency, is critical for low-abundance targets where weak NSB can constitute a significant portion of the total signal.
Experimental Protocol: Titrating Wash Stringency
- Run the complete ELISA using a low-concentration standard and a high NSB control (e.g., concentrated sample matrix).
- Vary detergent (Tween-20) concentration in the wash buffer: 0.01%, 0.05%, 0.1%, 0.5%.
- Vary ionic strength: Compare PBS vs. high-salt (e.g., PBS + 0.5M NaCl).
- Vary wash volume and repeats: 3x 200µL washes vs. 5x 300µL washes.
- Plot the signal for the low standard and the NSB control. Calculate the specific binding (Low Std Signal – NSB Control Signal). The condition yielding the highest specific binding is optimal.
The Scientist's Toolkit: Research Reagent Solutions
| Item | Function & Rationale |
|---|---|
| High-Affinity, Monoclonal Capture Antibody | Provides specificity and strong binding to capture low-concentration analyte amidst complex matrix. |
| HRP or ALP-Labeled Detection Antibody | Enzymatic amplification is crucial for detecting low-abundance targets. Choice depends on substrate sensitivity and matrix interference. |
| Ultra-Sensitive Chemiluminescent Substrate | Offers a wider dynamic range and higher sensitivity than colorimetric substrates for low-level detection. |
| Low-Binding, High-Protein-Binding Capacity Microplates | Maximizes antibody coating efficiency while minimizing passive adsorption of analyte to plate. |
| Precision Multi-Channel Pipette & Washer System | Ensures reproducibility of liquid handling and thorough, consistent washing—key for precise, low-background assays. |
| Sample Diluent with Blocking Agents | Further reduces matrix effects by providing a consistent environment for the sample, often containing a mild blocking protein and detergents. |
Integrated Workflow for Optimization
The interdependent nature of blocking, incubation, and washing requires a systematic approach. The following workflow diagram outlines the decision-making process.
ELISA Optimization Decision Workflow
Key Signaling Pathway: Non-Specific Binding Interference
Understanding the sources of NSB is key to mitigating it. The following diagram illustrates competing pathways in an ELISA well.
Specific vs. Non-Specific Binding Pathways
For ELISA quantification of low-abundance metabolic biomarkers, empirical optimization of blocking buffers, incubation kinetics, and wash stringency is non-negotiable. This guide provides a structured framework, emphasizing data-driven decisions (Tables 1 & 2) and systematic protocols. The interdependent nature of these parameters necessitates an iterative approach, as visualized in the workflow, to achieve an assay with the necessary sensitivity, specificity, and precision required for rigorous biomedical research and drug development.
Addressing Hook Effect and Prozone Phenomenon at Extremely Low Concentrations
Within the context of research focused on detecting low-abundance metabolic biomarkers in biological fluids using ELISA, the interference from hook effects and the prozone phenomenon presents a significant analytical challenge. These effects, typically associated with extremely high analyte concentrations, are increasingly observed at the low concentration extremes due to complex matrix effects, antibody affinity issues, and assay design limitations. This whitepaper provides an in-depth technical guide to understanding, identifying, and mitigating these interferences to ensure accurate quantification of critical biomarkers.
Mechanisms and Theoretical Framework
The classic "hook effect" in sandwich ELISA occurs when an excess of analyte saturates both capture and detection antibodies, preventing the formation of the necessary "sandwich" complex, leading to a falsely low signal. The prozone phenomenon, often used interchangeably but distinct, results in precipitation or signal inhibition due to antibody excess in agglutination or immunoassays. At extremely low concentrations (sub-pg/mL), these effects can manifest due to:
- High-Affinity Antibody Paratope Occupation: Limited analyte molecules are bound monovalently by high-affinity paratopes, failing to bridge to the detection antibody.
- Matrix Interference: Components in biological fluids (e.g., serum proteins) can cause non-specific aggregation or block binding sites at low analyte levels.
- Heterophilic Antibodies: Enduman antibodies can cross-link assay antibodies in the absence of the target analyte, creating a false bridge or blockade.
Experimental Protocols for Detection and Verification
Protocol 1: Serial Dilution Linearity Test
- Objective: To identify a hook effect by observing non-linear signal response upon sample dilution.
- Procedure:
- Prepare a series of dilutions (e.g., 1:1, 1:2, 1:4, 1:8, 1:16) of the test sample using the recommended assay buffer.
- Run each dilution in duplicate on the ELISA plate per the manufacturer's protocol.
- Plot the observed concentration (or raw OD) against the dilution factor.
- Interpretation: In a hook-affected sample, the calculated concentration will increase with dilution until the interference is eliminated, then plateau or decrease. A linear response indicates no hook effect.
Protocol 2: Spike-and-Recovery with Analyte Standard
- Objective: To assess matrix interference affecting antibody binding at low endogenous levels.
- Procedure:
- Aliquot a low-concentration sample (near LLOQ) into three parts.
- Spike one part with a known low concentration of purified analyte standard (low spike). Spike a second with a mid-range concentration (mid spike). Leave the third unspiked.
- Measure all aliquots.
- Calculate % Recovery = 100% * (Measured[spiked] – Measured[unspiked]) / (Spiked Amount).
- Interpretation: Recovery outside 80-120% suggests matrix interference that can precipitate prozone-like effects at the assay's low end.
Protocol 3: Heterophile/Interference Blocking Tube (HBT) Test
- Objective: To confirm interference from heterophilic antibodies or other serum factors.
- Procedure:
- Divide the sample into two.
- Treat one aliquot with a commercial heterophile blocking reagent (HBR) or a non-specific immunoglobulin (e.g., 10% mouse IgG for a mouse monoclonal-based assay) for 1 hour at room temperature.
- Run both treated and untreated samples in the ELISA.
- Interpretation: A significant difference (>30%) in measured concentration between treated and untreated samples confirms the presence of an interferent.
Mitigation Strategies and Optimized Workflow
Implementing a robust workflow is critical for reliable low-abundance biomarker detection.
Key Mitigation Approaches:
- Assay Re-optimization: Titrate antibody pairs to use the highest possible concentration of capture antibody without increasing background.
- Sample Pre-Dilution: Establish a mandatory pre-dilution protocol that places the expected analyte concentration in the validated linear mid-range of the standard curve.
- Use of Blocking Agents: Incorporate specific (e.g., anti-animal Ig) or non-specific (e.g., polyvinylpyrrolidone, chondroitin sulfate) blocking agents into the sample diluent.
- Alternative Assay Formats: Employed electrochemiluminescence (ECL) or digital ELISA (Simoa) platforms with superior dynamic range and sensitivity, reducing low-end artifacts.
Table 1: Characteristic Signals of Hook/Prozone Effects at Different Analyte Ranges
| Analyte Concentration Range | Expected Signal Trend | Signal Trend with Hook/Prozone | Suggested Diagnostic Test |
|---|---|---|---|
| Extremely Low (< LLOQ) | Increase linearly with [Analyte] | False elevation or suppression | Spike-and-Recovery, HBT Test |
| Linear Range | Linear increase with [Analyte] | None (ideal zone) | None |
| High (> ULOQ) | Plateau at maximum signal | Sharp decrease (Classic Hook) | Serial Dilution Test |
Table 2: Performance of Mitigation Strategies in Model Low-Abundance Assays
| Mitigation Strategy | Mean Recovery at LLOQ (%) | CV Reduction (%) | Required Sample Volume | Implementation Complexity |
|---|---|---|---|---|
| None (Direct Assay) | 45 ± 25 | Baseline | Low | Low |
| Pre-Dilution (1:5) | 92 ± 8 | 35 | Moderate | Low |
| HBR Addition | 105 ± 12 | 28 | Low | Moderate |
| Antibody Re-Titration | 98 ± 6 | 40 | Low | High |
| Platform Switch (to Digital ELISA) | 102 ± 5 | 50 | Very Low | Very High |
The Scientist's Toolkit: Key Research Reagent Solutions
| Item | Function/Application in Mitigation |
|---|---|
| Heterophilic Blocking Reagent (HBR) | A cocktail of animal immunoglobulins and inert proteins to saturate interfering human anti-animal antibodies in samples. |
| Analyte-Free Matrix (e.g., Charcoal-Stripped Serum) | Used for preparing standard curve diluents and for spike-and-recovery experiments to match sample matrix. |
| High-Affinity, Monoclonal Antibody Pair | Minimizes non-specific binding and improves specificity at low analyte concentrations, reducing spurious bridging. |
| Signal Amplification Systems (e.g., Tyramide) | Enhances sensitivity, allowing higher sample dilutions to move away from the problematic low-concentration zone. |
| Commercial Hook Effect/RF Interference Test Kits | Pre-formulated controls and spiked samples designed to validate assay robustness against these effects. |
| Polymer-Based Wash Buffer | Contains surfactants and polymers (e.g., Tween-20, Dextran) to reduce non-specific binding more effectively than standard buffers. |
In the context of quantifying low-abundance metabolic biomarkers in biological fluids via ELISA, the reliability of the derived concentration is fundamentally tied to the integrity of the standard curve. This technical guide details best practices for establishing a robust standard curve, focusing on the critical parameters of range, fit, and the Lower Limit of Quantification (LLOQ). These elements are paramount for ensuring sensitivity and accuracy in preclinical and clinical research.
Core Components of a Robust Standard Curve
Defining the Optimal Range
The standard curve must span the entire expected physiological and pathological concentration range of the biomarker in the sample matrix.
Table 1: Recommended Standard Curve Parameters for Low-Abundance Biomarkers
| Parameter | Recommendation | Rationale |
|---|---|---|
| Number of Standards | Minimum 7-8 non-zero points | Ensures adequate points for non-linear curve fitting. |
| Concentration Range | 1.5-2 logs above and below the expected [ ] | Covers expected sample variability. |
| Replicates | Minimum duplicates, triplicates preferred | Assesses intra-assay precision at each point. |
| Matrix | Ideally, the same as the sample (e.g., pooled plasma) | Corrects for matrix interference effects. |
Selection of Curve Fit
The choice of model must be empirically validated. A four- or five-parameter logistic (4PL/5PL) regression is standard for ELISA.
Table 2: Comparison of Common Curve Fit Models
| Model | Equation (Simplified) | Best For | Key Consideration |
|---|---|---|---|
| Linear | y = mx + c | High-concentration, wide dynamic range. | Poor fit for sigmoidal ELISA data. |
| Log-Linear | y = m log(x) + c | Narrow range within the central linear portion. | Inaccurate at upper and lower asymptotes. |
| 4PL | y = D + (A-D)/(1+(x/C)^B) | Symmetrical sigmoidal curves. | Assumes symmetry around inflection point. |
| 5PL | y = D + (A-D)/(1+(x/C)^B)^G | Asymmetrical sigmoidal curves. | 'G' parameter models asymmetry; better for ultrasensitive assays. |
Experimental Protocol for Curve Fit Validation:
- Run a full standard curve in the relevant biological matrix (e.g., charcoal-stripped serum).
- Fit data using 4PL and 5PL models in dedicated analysis software (e.g., SoftMax Pro, GraphPad Prism).
- Visually inspect the fit across the entire range, especially at the lower and upper asymptotes.
- Statistically compare the residual sum of squares (RSS) and the accuracy of back-calculated standard concentrations. The model yielding the most consistent accuracy (80-120%) and precision (CV <20%) across the range should be selected.
Determining the Lower Limit of Quantification (LLOQ)
The LLOQ is the lowest standard concentration that can be measured with acceptable accuracy and precision. It is a fundamental metric for low-abundance biomarker studies.
Experimental Protocol for LLOQ Determination (Based on FDA/EMA Guidelines):
- Prepare Samples: Analyze a minimum of 5-6 independent replicates of the candidate LLOQ standard (and lower concentrations) in the sample matrix.
- Define Acceptance Criteria: Typically, the mean back-calculated concentration must be within 80-120% of the nominal value, with a coefficient of variation (CV) ≤20%.
- Perform Assay: Run replicates over at least 3 separate days to assess inter-assay performance.
- Calculate and Validate: The LLOQ is the lowest concentration that meets accuracy and precision criteria across all runs. Samples below the LLOQ should be reported as "Below Quantifiable Limit (BQL)."
Table 3: Example LLOQ Validation Data for a Metabolic Biomarker ELISA
| Nominal Conc. (pg/mL) | Intra-assay Accuracy (% Nominal) | Intra-assay CV (%) | Inter-assay Accuracy (% Nominal) | Inter-assay CV (%) | LLOQ Qualification |
|---|---|---|---|---|---|
| 0.5 | 65% | 35% | 58% | 40% | Failed |
| 1.0 | 88% | 18% | 85% | 19% | Passed |
| 2.0 | 95% | 12% | 92% | 15% | Passed |
The Scientist's Toolkit: Research Reagent Solutions
Table 4: Essential Materials for Standard Curve and LLOQ Validation
| Item | Function in Experiment |
|---|---|
| Certified Reference Standard | Provides the known, high-purity analyte for generating the calibration curve. Traceability is critical. |
| Matrix-Matched Diluent | A pool of the biological fluid (e.g., plasma, urine) free of the target analyte, used to dilute standards and mimic sample background. |
| High-Precision Microplate Reader | Measures optical density (OD) or chemiluminescence with the sensitivity and dynamic range required for low-concentration detection. |
| Data Analysis Software | Specialized software capable of performing 4PL/5PL regression, weighting algorithms, and calculating LLOQ based on statistical parameters. |
| Low-Binding Microtubes & Pipette Tips | Minimizes analyte loss due to adsorption at very low concentrations. |
| Calibrated, High-Accuracy Pipettes | Ensures precise and reproducible dispensing of small volumes for standard preparation. |
Visualization of Workflows
Standard Curve Development & Validation Workflow
Model Selection Logic for ELISA Data Analysis
Within the rigorous demands of research on low-abundance metabolic biomarkers in biological fluids using ELISA, reproducibility is paramount. This technical guide details the critical challenges and solutions associated with reagent stability and lot-to-lot variability. We provide a systematic framework for characterization, validation, and quality control to ensure reliable quantification of biomarkers critical for disease diagnosis, patient stratification, and drug development.
The accurate measurement of low-abundance metabolic biomarkers (e.g., eicosanoids, steroid hormones, oxidative stress markers) in complex matrices like serum, plasma, or urine is a cornerstone of translational research. Enzyme-Linked Immunosorbent Assay (ELISA) remains a preferred methodology due to its sensitivity, specificity, and throughput. However, its reliability is intrinsically tied to the consistency of its core components. Reagent instability and uncontrolled lot-to-lot variation introduce systematic error, obscuring true biological signals and jeopardizing the longitudinal and multi-site studies essential for biomarker validation. This document frames these issues within the context of establishing robust, reproducible ELISA protocols for low-abundance targets.
Core Challenges: Stability and Variability
Reagent Stability
Critical ELISA reagents are inherently labile. Their degradation directly impacts assay sensitivity, dynamic range, and background.
- Antibodies (Capture/Detection): Susceptible to denaturation, aggregation, and microbial contamination. Repeated freeze-thaw cycles or storage at inappropriate temperatures degrade binding affinity.
- Conjugated Enzymes (HRP, ALP): Loss of enzymatic activity over time, especially in sub-optimal buffers or with exposure to light (fluorogenic substrates).
- Calibrators/Standards: Lyophilized or prepared standard proteins can degrade, altering the reference curve's accuracy.
- Biological Samples: The target biomarkers themselves (e.g., eicosanoids, peptides) are often unstable in collected biological fluids without proper preservatives and storage conditions.
Lot-to-Lot Variability
Even with stable storage, new reagent lots introduce variability from manufacturing processes.
- Antibody Affinity: Differences in immunization and purification yield variations in epitope recognition and binding strength.
- Conjugation Efficiency: The enzyme-to-antibody ratio in detection conjugates can vary, affecting signal intensity.
- Buffer Composition: Subtle changes in pH, ionic strength, or stabilizing agents (e.g., BSA, protease inhibitors) can influence antigen-antibody kinetics.
Table 1: Impact of Reagent Variables on Key ELISA Performance Parameters
| Reagent Variable | Affected Parameter | Typical Observed Variation (Poorly Controlled) | Target Tolerance for Low-Abundance Biomarkers |
|---|---|---|---|
| Antibody Lot Change | IC50 / EC50 Shift | 20-50% | <15% |
| Conjugate Lot Change | Max Signal (OD) | 15-40% | <10% |
| Standard Preparation | Inter-assay CV | 10-25% | <12% |
| Substrate Age (Post-Recon) | Background Signal | Increase of 0.05-0.2 OD | <0.05 OD increase |
| Plate Coating Stability | Slope of Standard Curve | 10-30% change | <10% change |
Table 2: Recommended Storage Stability for Critical ELISA Reagents
| Reagent | Recommended Storage | Shelf Life (Unopened) | Post-Opening/Reconstitution Stability |
|---|---|---|---|
| Coated Microplates | Desiccant, 4°C | 6-12 months | Use within plate seal duration |
| Lyophilized Antibody | -20°C to -80°C | 2-3 years | Aliquot; avoid >3 freeze-thaws |
| Liquid Antibody | Aliquot at -80°C | 1-2 years | 4°C for 4-6 weeks (with preservative) |
| Enzyme Conjugate | Glycerol aliquot at -20°C | 1-2 years | 4°C for 1-2 months |
| TMB Substrate | 4°C, in dark | 1 year | Use within 24h if prepared |
| Biomarker Standards | Aliquot at -80°C | Varies | Single-use aliquots recommended |
Experimental Protocols for Characterization & Validation
Protocol 1: Parallel Testing for New Reagent Lot Acceptance
Purpose: To qualify a new lot of a critical reagent (e.g., detection antibody) against the expiring in-use lot. Materials: Old lot reagent, new lot reagent, validated ELISA kit components, standard curve samples, 3 QC samples (low, mid, high). Procedure:
- Run a single ELISA plate where the only variable is the reagent lot under test.
- Use identical plates, buffers, samples, incubations, and reader settings.
- Generate full standard curves and assay all QC samples in replicate (n=6).
- Analysis: Compare four parameters:
- Parallelism: Statistical comparison of curve slopes (should be non-significant, p>0.05 by t-test).
- Potency: Difference in IC50/EC50 (must be within pre-defined limits, e.g., ±15%).
- Precision: Inter-assay CV of QC samples (<15%).
- Recovery: Spike-and-recovery of QC samples in matrix (80-120%).
Protocol 2: Accelerated Stability Study for Critical Reagents
Purpose: To estimate the real-time shelf life of a formulated reagent (e.g., conjugated antibody). Materials: Aliquots of the reagent. Procedure:
- Store aliquots at stress conditions (e.g., 25°C, 37°C) and recommended conditions (e.g., 4°C, -20°C).
- At defined time points (e.g., 1, 2, 4, 8 weeks), remove an aliquot from each condition.
- Test all aliquots simultaneously in a functional ELISA (Protocol 1).
- Analysis: Plot key activity parameter (e.g., OD max, EC50) vs. time. Use the Arrhenius equation model to extrapolate degradation rates and predict shelf-life at recommended storage.
Protocol 3: Verification of Biomarker Stability in Biological Matrix
Purpose: To establish pre-analytical handling conditions for the target biomarker. Materials: Freshly collected biological fluid (plasma/serum/urine), appropriate anticoagulants/preservatives. Procedure:
- Spike a known concentration of purified biomarker (or use endogenous positive sample) into the matrix.
- Aliquot into different storage conditions: room temperature (2h, 6h, 24h), 4°C (24h, 72h), -20°C/-80°C (1 week, 1 month, 3 months). Include freeze-thaw cycles (1, 3, 5 cycles).
- Assay all aliquots in a single ELISA run alongside a freshly prepared standard curve.
- Analysis: Calculate % recovery relative to the T=0 aliquot. Define acceptable stability thresholds (e.g., >85% recovery).
Visualizing the Workflow and Relationships
Title: New Reagent Lot Validation and Monitoring Workflow
Title: Impact Chain of Reagent Issues on Biomarker Research
The Scientist's Toolkit: Research Reagent Solutions
Table 3: Essential Materials and Solutions for Robust ELISA Development
| Item | Function & Rationale |
|---|---|
| Bulk Master Lot Reagents | Purchase a sufficient quantity of a single lot of critical components (antibodies, conjugates) for an entire longitudinal study to eliminate lot-to-lot variability. |
| Single-Use, Pre-Aliquoted Reagents | Commercially available or custom-prepared aliquots eliminate freeze-thaw cycles and ensure consistent unit-dosing, enhancing precision. |
| Lyophilized, Stabilized Standards | Lyophilization in optimal stabilizing matrices improves long-term stability and reduces variability compared to liquid standards. |
| Matrix-Matched Calibrators & Controls | Calibrators prepared in the target biological matrix (e.g., stripped serum) account for matrix effects, crucial for accurate recovery calculations. |
| Real-Time Stability Monitoring Tags | Electronic data loggers or chemical indicator tags monitor temperature exposure of shipped and stored reagents, identifying potential stability breaches. |
| Pre-Coated, Validated Microplates | Plates coated under controlled GMP-like conditions offer superior consistency and lot documentation compared to in-lab coating. |
| Ready-to-Use, Stabilized Substrate | Single-component, stabilized chromogenic/chemiluminescent substrates reduce preparation error and improve signal consistency over time. |
| Protease & Phosphatase Inhibitor Cocktails | Essential additives to sample collection buffers to preserve labile metabolic biomarkers from degradation pre-assay. |
Ensuring ELISA reproducibility for low-abundance biomarkers demands a proactive, data-driven approach to reagent management. Key recommendations include:
- Characterize Extensively: Perform rigorous parallel testing for all new lots.
- Control Pre-Analytics: Define and validate sample handling protocols using Protocol 3.
- Invest in Consistency: Prioritize bulk lots, single-use aliquots, and stabilized formats, even at higher upfront cost.
- Document Meticulously: Maintain a complete reagent genealogy (lot numbers, storage conditions, opening dates) for every experiment.
- Implement Routine QC: Use statistical control charts tracking standard curve parameters and QC sample values to detect assay drift early.
By embedding these principles into the research workflow, scientists can significantly reduce technical noise, thereby enhancing the fidelity of data generated in the pursuit of clinically relevant metabolic biomarkers.
Validation Parameters and Platform Comparison: Is ELISA the Right Tool?
This technical guide details the essential validation metrics—Limit of Detection (LOD), Limit of Quantification (LOQ), Precision, Accuracy, and Recovery—within the critical context of developing and validating Enzyme-Linked Immunosorbent Assay (ELISA) methods for quantifying low-abundance metabolic biomarkers in biological fluids. The accurate determination of these metrics is foundational to ensuring data reliability in preclinical and clinical research, directly impacting downstream decisions in drug development and personalized medicine.
The quantification of low-abundance metabolic biomarkers (e.g., eicosanoids, steroids, oxidative stress markers) in complex matrices like serum, plasma, or urine presents significant analytical challenges. ELISA remains a cornerstone technique due to its sensitivity, specificity, and throughput. However, without rigorous method validation, data generated are scientifically unreliable. This whitepaper deconstructs the core validation parameters, providing a framework for scientists to establish robust, reproducible, and fit-for-purpose ELISA assays.
Core Validation Metrics: Definitions and Experimental Determinations
Limit of Detection (LOD)
Definition: The lowest concentration of an analyte that can be reliably distinguished from zero (a blank sample). It is a measure of sensitivity, not a concentration for precise quantification.
Experimental Protocol (Standard Deviation of the Blank Method):
- Prepare and analyze a minimum of 20 independent blank matrix samples (matrix without the analyte).
- Measure the absorbance for each blank replicate.
- Calculate the mean (µblank) and standard deviation (σblank) of these blank responses.
- LOD is typically calculated as: LOD = µblank + 3*σblank. This concentration yields a signal with a 99% confidence level of being greater than the blank.
Limit of Quantification (LOQ)
Definition: The lowest concentration of an analyte that can be quantified with acceptable precision and accuracy (typically defined as ≤20% CV and 80-120% recovery at the time of validation). It defines the lower boundary of the quantitative working range.
Experimental Protocol:
- Prepare and analyze a minimum of 6 independent matrix samples spiked with the analyte at a concentration near the estimated LOQ.
- Calculate the precision (Coefficient of Variation, CV%) and accuracy (Percent Recovery) for this low-level sample (see sections 2.3 & 2.4).
- If the CV% is ≤20% and recovery is within 80-120%, the spiked concentration is the LOQ. If not, repeat at a higher concentration until these criteria are met.
Precision
Definition: The closeness of agreement among a series of measurements obtained from multiple sampling of the same homogeneous sample. It is expressed as variance, standard deviation, or coefficient of variation (CV%).
Experimental Protocol (Within-run and Between-run):
- Within-run (Repeatability): Analyze a minimum of 6 replicates of quality control (QC) samples at three concentrations (Low, Mid, High) within a single analytical run. Calculate the CV% for each level.
- Between-run (Intermediate Precision): Analyze the same three QC levels across a minimum of 3 different runs, on different days, with different analysts or equipment where applicable. Calculate the overall CV% for each level.
Accuracy & Recovery
Definition: The closeness of agreement between the measured value and an accepted reference value or true value. In biomarker ELISA, accuracy is typically assessed via Recovery.
Experimental Protocol (Spike/Recovery):
- Prepare a pooled biological matrix sample.
- Spike the analyte into the matrix at three known concentrations spanning the assay range (e.g., low, mid, high).
- Prepare an equivalent set of spikes in the assay buffer (non-matrix) to serve as the "true value" reference (100% recovery expected).
- Analyze all samples in the same run.
- Calculate Percent Recovery:
- Recovery (%) = (Concentration measured in spiked matrix / Concentration measured in spiked buffer) × 100%
- Recovery between 80-120% is generally acceptable for biomarker ELISAs.
Table 1: Typical Acceptance Criteria for ELISA Validation of Low-Abundance Biomarkers
| Metric | Typical Acceptance Criteria | Key Experimental Requirement |
|---|---|---|
| LOD | Signal ≥ Mean(Blank) + 3*SD(Blank) | Analysis of ≥20 independent blank matrix samples. |
| LOQ | CV% ≤20% and Recovery 80-120% at that concentration. | Analysis of ≥6 replicates at the claimed LOQ. |
| Precision (CV%) | Within-run: ≤15% (≤20% at LOQ). Between-run: ≤20%. | Analysis of QC samples at multiple levels across multiple runs. |
| Accuracy/Recovery | 80-120% recovery across the assay range. | Spike/Recovery in matrix vs. buffer at 3 concentrations. |
Integrated Workflow for ELISA Method Validation
The logical progression for establishing a validated ELISA method follows a defined pathway from foundational parameter determination to final performance verification.
ELISA Method Validation Workflow
Critical Signaling Pathway for Biomarker Release
Understanding the biological context of a metabolic biomarker is essential for appropriate sample handling. For instance, the release of a stress biomarker like a specific eicosanoid involves a cascade of cellular events.
Example Pathway for Eicosanoid Biomarker Release
The Scientist's Toolkit: Key Research Reagent Solutions
Table 2: Essential Materials for Validating a Biomarker ELISA
| Reagent/Material | Function in Validation |
|---|---|
| Certified Reference Standard | Provides the known, pure analyte for spiking experiments to determine accuracy, recovery, and prepare calibration curves. |
| Charcoal/Dextran-Treated Matrix | Matrix (e.g., serum) stripped of endogenous analytes; used to prepare consistent blank and spiked samples for LOD/LOQ/Recovery. |
| Matrix-Matched Calibrators | Calibration standards prepared in the same biological matrix as samples; critical for correcting matrix effects. |
| High-Affinity, Specific Antibody Pair | Monoclonal (capture) and polyclonal (detection) antibodies with minimal cross-reactivity ensure assay specificity and sensitivity. |
| Stable Enzyme Conjugate | Horseradish Peroxidase (HRP) or Alkaline Phosphatase (AP) conjugated to detection antibody; must have consistent activity for precision. |
| Low-Autofluorescence Microplates | Plates that minimize background signal, crucial for achieving a low LOD for low-abundance targets. |
| Ultra-Sensitive Chemiluminescent Substrate | Provides higher signal amplification than colorimetric substrates, essential for detecting signals at the LOQ. |
Within the context of advancing research on low-abundance metabolic biomarkers in biological fluids, the selection of an analytical platform is paramount. Enzyme-Linked Immunosorbent Assay (ELISA) and Liquid Chromatography-Tandem Mass Spectrometry (LC-MS/MS) represent two pillars of quantitative bioanalysis. This guide provides a detailed technical comparison of their sensitivity, framed by their application in metabolite profiling for biomarker discovery and validation in complex matrices like serum, plasma, and urine.
Fundamental Principles and Sensitivity Drivers
ELISA: Immunoassay-Based Detection
ELISA sensitivity is primarily governed by the affinity and specificity of the antibody-antigen interaction. For low-abundance metabolites, competitive or sandwich (if applicable) formats are employed. The enzymatic amplification step (e.g., horseradish peroxidase) can detect down to picogram-per-milliliter (pg/mL) concentrations, but is ultimately limited by antibody cross-reactivity with structurally similar molecules and matrix effects.
LC-MS/MS: Physicochemical Separation and Detection
LC-MS/MS sensitivity is driven by the efficiency of ionization (e.g., Electrospray Ionization - ESI), the selectivity of chromatographic separation, and the specificity of multiple reaction monitoring (MRM). It provides direct quantification based on mass-to-charge ratio (m/z) and fragmentation patterns. Sensitivity can reach femtogram-per-milliliter (fg/mL) levels with optimal sample cleanup and advanced instrumentation (e.g., high-resolution MS).
Quantitative Sensitivity Comparison
The following table summarizes typical sensitivity and key performance metrics for both platforms in the context of metabolite profiling.
Table 1: Comparative Sensitivity and Performance Metrics
| Parameter | ELISA | LC-MS/MS (Triple Quadrupole) | Notes |
|---|---|---|---|
| Typical LOD (Lower Limit of Detection) | 1-100 pg/mL | 0.1-10 pg/mL (fg/mL possible with SIDA) | Depends heavily on metabolite and antibody/ionization efficiency. |
| Dynamic Range | 1.5-2 logs (linear) | 4-6 logs (linear) | LC-MS/MS offers wider linear range. |
| Multiplexing Capacity | Low (1-10 analytes/well) | High (100s of analytes/run) | LC-MS/MS excels in targeted metabolomics panels. |
| Sample Throughput | High (96/384-well plates) | Moderate to High (automated) | ELISA faster for large sample counts of single/few analytes. |
| Assay Development Time | Long (months for antibody production) | Relatively Short (weeks) | LC-MS/MS method development is more predictable. |
| Specificity/Cross-Reactivity | High risk from similar epitopes | Very High (chromatography + MRM) | LC-MS/MS rarely confuses structural isomers if separated. |
| Sample Volume Required | Low (10-100 µL) | Low to Moderate (10-500 µL) | Both can be adapted for low volume. |
| Approximate Cost per Sample | $10-$50 | $50-$200+ | ELISA cheaper at scale; LC-MS/MS cost varies with multiplex scale. |
Detailed Experimental Protocols
Protocol: Competitive ELISA for a Low-Abundance Metabolite
This protocol is typical for a small molecule metabolite lacking multiple epitopes for a sandwich assay.
A. Reagent Preparation:
- Coating: Dilute a metabolite-protein conjugate (e.g., metabolite-BSA) in carbonate-bicarbonate buffer (pH 9.6) to 1-10 µg/mL. Coat a 96-well plate (100 µL/well). Incubate overnight at 4°C.
- Blocking: Aspirate coating solution. Block with 200 µL/well of 1-5% BSA or casein in PBS for 1-2 hours at room temperature (RT). Wash 3x with PBS containing 0.05% Tween-20 (PBST).
- Standard/Sample Prep: Prepare metabolite standards in assay buffer (PBS with 0.1% BSA). For biological fluids, dilute samples in assay buffer (may require acid precipitation or SPE cleanup).
B. Assay Procedure:
- Add 50 µL of standard or sample to each well.
- Immediately add 50 µL of primary antibody (specific to the metabolite) at optimized dilution. Mix gently. Incubate for 1-2 hours at RT.
- Wash plate 5x with PBST.
- Add 100 µL/well of enzyme-conjugated secondary antibody (e.g., anti-rabbit IgG-HRP). Incubate for 1 hour at RT. Wash 5x.
- Add 100 µL/well of chromogenic substrate (e.g., TMB). Incubate in the dark for 15-30 minutes.
- Stop the reaction with 50 µL/well of 1M H₂SO₄.
- Read absorbance at 450 nm immediately.
C. Data Analysis: Plot log(concentration) of standards vs. absorbance (or %B/B0). Fit a 4-parameter logistic curve to calculate sample concentrations.
Protocol: Targeted LC-MS/MS Quantification of Metabolites
This describes a standard MRM-based quantification workflow using internal standards.
A. Sample Preparation (Protein Precipitation):
- Aliquot 50 µL of plasma/serum.
- Add 200 µL of ice-cold methanol containing stable isotope-labeled internal standards (SIL-IS) for each target metabolite.
- Vortex vigorously for 1 minute, then incubate at -20°C for 1 hour to precipitate proteins.
- Centrifuge at 14,000 x g for 15 minutes at 4°C.
- Transfer 150 µL of supernatant to a clean LC-MS vial. Evaporate to dryness under a gentle nitrogen stream.
- Reconstitute the dried extract in 50 µL of initial mobile phase (e.g., 95% water, 5% acetonitrile with 0.1% formic acid). Vortex and centrifuge.
B. LC-MS/MS Analysis:
- Chromatography: Use a reversed-phase C18 column (2.1 x 100 mm, 1.7 µm). Gradient elution from 5% to 95% organic phase (acetonitrile or methanol) over 10-15 minutes. Flow rate: 0.3 mL/min. Column temperature: 40°C.
- Mass Spectrometry (ESI Negative/Positive Mode):
- Source Parameters: Capillary Voltage: 3.0 kV; Source Temperature: 150°C; Desolvation Temperature: 500°C; Cone/Desolvation Gas Flow: Optimized.
- MRM Setup: For each metabolite and its SIL-IS, optimize cone voltage and collision energy to define precursor > product ion transitions. Use the most intense transition for quantification, a second for confirmation.
- Data Acquisition & Processing: Acquire data in MRM mode. Use instrument software (e.g., MassLynx, Analyst) to integrate peak areas for analyte and IS. Calculate analyte/IS area ratio for quantification against a linear calibration curve.
Visualized Workflows and Pathways
Title: Competitive ELISA Experimental Workflow
Title: Targeted LC-MS/MS (MRM) Analysis Workflow
Title: Platform Selection Logic for Metabolite Analysis
The Scientist's Toolkit: Key Research Reagent Solutions
Table 2: Essential Materials for Metabolite Profiling Assays
| Item | Function in ELISA | Function in LC-MS/MS |
|---|---|---|
| High-Affinity Primary Antibody | Critical for specificity and sensitivity. Must recognize free metabolite with minimal cross-reactivity. | Not required for detection. May be used for immunoaffinity enrichment prior to LC-MS/MS. |
| Stable Isotope-Labeled Internal Standards (SIL-IS) | Not typically used. | Essential. Corrects for matrix effects, ionization efficiency, and sample preparation losses. |
| Metabolite-Protein Conjugate | Required for plate coating in competitive ELISA. | Not applicable. |
| Enzyme-Labeled Secondary Antibody | Provides signal amplification (e.g., HRP for colorimetric readout). | Not applicable. |
| Chromatography Column (e.g., C18) | Not applicable. | Critical. Separates metabolites from matrix and isomers; impacts sensitivity and specificity. |
| MS-Compatible Buffers (FA, AA, NH4Ac) | Not applicable (detergents interfere). | Critical. Volatile buffers (Formic Acid, Ammonium Acetate) enable ESI and clean chromatography. |
| Solid-Phase Extraction (SPE) Cartridges | Can be used for sample cleanup to reduce interference. | Often used for complex matrices to concentrate analytes and remove phospholipids/salts. |
| Quality Control (QC) Materials | Pooled biological matrix for inter-assay precision. | Pooled matrix spiked with analytes at low, mid, high concentrations for batch acceptance. |
This technical guide presents a comparative analysis of conventional Enzyme-Linked Immunosorbent Assay (ELISA) and emerging digital ELISA platforms, specifically Single Molecule Array (Simoa) and Singulex Erenna technology. Framed within a thesis on detecting low-abundance metabolic biomarkers in biological fluids, we examine the fundamental principles, analytical sensitivity, dynamic range, and practical applications of each platform. The shift from analog to digital single-molecule counting represents a paradigm shift in biomarker research and therapeutic drug monitoring, enabling detection of proteins at sub-femtogram per milliliter concentrations previously considered undetectable in complex matrices like serum, plasma, and cerebrospinal fluid.
The quantification of low-abundance metabolic biomarkers—such as cytokines, neurofilaments, cardiac troponins, and amyloid-beta peptides—is critical for early disease diagnosis, monitoring therapeutic efficacy, and understanding pathophysiological pathways. Conventional ELISA, the longstanding gold standard, often lacks the requisite sensitivity (typically in the low picogram per milliliter range) for these analytes at physiological levels in biological fluids. Digital ELISA platforms overcome this limitation by isolating and quantifying individual immunocomplexes, effectively digitizing the detection signal.
Core Technology Principles
Conventional Sandwich ELISA
A heterogeneous immunoassay where the target antigen is captured by an immobilized antibody and detected by an enzyme-conjugated secondary antibody. The enzyme catalyzes a colorimetric, chemiluminescent, or fluorescent reaction, with signal intensity proportional to analyte concentration, measured in bulk (analog) format.
Digital ELISA (Simoa)
Developed by Quanterix, Simoa (Single Molecule Array) uses paramagnetic beads coated with capture antibodies. Immunocomplexes are formed and labeled with an enzyme (typically beta-galactosidase). Beads are then loaded into femtoliter-sized wells, each sized to hold a single bead. A fluorogenic substrate is added. If a bead carries an enzyme label, it generates a concentrated, fluorescent product that is easily imaged as an "on" signal. Beads without analyte generate no signal ("off"). The concentration is determined from the ratio of on-beads to total beads.
Singulex Erenna Immunoassay System
The Singulex (now part of Cytiva) Erenna system also employs paramagnetic microparticles for capture. Detection uses a fluorescently labeled antibody and capillary-based flow cytometry. Single immunocomplexes on beads are hydrodynamically focused through a laser interrogation point in a narrow capillary, allowing for the counting of individual fluorescent events, minimizing background noise.
Quantitative Performance Comparison
Table 1: Analytical Performance Metrics of Immunoassay Platforms
| Parameter | Conventional ELISA | Digital ELISA (Simoa) | Singulex Erenna |
|---|---|---|---|
| Typical Sensitivity (LLoQ) | 1-10 pg/mL | 0.01-0.1 pg/mL (10-100 fg/mL) | 0.1-0.5 pg/mL |
| Dynamic Range | 2-3 logs | 3-4 logs | 3-4 logs |
| Sample Volume | 50-100 µL | 25-50 µL | 25-50 µL |
| Assay Time | 4-8 hours | 3-6 hours | 2-4 hours |
| Precision (CV%) | 10-15% | 5-10% | 5-12% |
| Multiplexing Capability | Low (plate-based) | Moderate (up to 4-plex) | Low (singleplex) |
| Core Detection Principle | Bulk colorimetric/chemiluminescent | Single-molecule fluorescence in wells | Single-molecule fluorescence in flow |
| Effective Enrichment | None | ~10^9 in femtoliter wells | Hydrodynamic focusing in capillary |
Table 2: Example Biomarker Detection Limits in Serum/Plasma
| Biomarker (Role) | Conventional ELISA LLoQ | Simoa LLoQ | Singulex LLoQ |
|---|---|---|---|
| Interleukin-6 (Inflammation) | 1-5 pg/mL | 0.01 pg/mL | 0.1 pg/mL |
| Total Tau (Neurodegeneration) | ~10 pg/mL | 0.02 pg/mL | 0.3 pg/mL |
| Cardiac Troponin I (Injury) | 10-50 pg/mL | 0.2 pg/mL | 0.9 pg/mL |
| Amyloid-β 1-42 (Alzheimer's) | ~50 pg/mL | 0.1 pg/mL | Not widely reported |
Experimental Protocols for Key Comparisons
Protocol: Simoa Assay for IL-6 in Human Plasma
- Bead Conjugation: Carboxylated paramagnetic beads (2.7 µm) are coupled with monoclonal anti-IL-6 capture antibody via EDC/sulfo-NHS chemistry.
- Sample Incubation: 50 µL of plasma sample (diluted 2-fold in sample diluent) is mixed with 50 µL of bead suspension (2×10^6 beads/mL) in a 96-well plate. Incubate with shaking for 60 minutes at room temperature (RT).
- Washing: Beads are magnetically captured and washed 3x with wash buffer using an automated washer.
- Detection Antibody Incubation: Resuspend beads in 50 µL of biotinylated anti-IL-6 detector antibody. Incubate with shaking for 30 minutes at RT. Wash 3x.
- Enzyme Labeling: Resuspend beads in 50 µL of streptavidin-β-galactosidase (SβG) conjugate. Incubate with shaking for 30 minutes at RT. Wash 3x thoroughly.
- Signal Generation: Resuspend beads in 25 µL of resorufin β-D-galactopyranoside substrate. Load bead mixture into the Simoa disc containing arrayed microwells.
- Imaging & Analysis: The disc is imaged after incubation. The percentage of active wells (beads generating fluorescent signal) is converted to average enzymes per bead (AEB) and interpolated from a calibration curve.
Protocol: Singulex Erenna Assay for cTnI in Serum
- Immunocomplex Formation: In a microplate well, mix 25 µL of serum standard/sample with anti-cTnI capture beads and a fluorescently labeled (e.g., Alexa Fluor 647) detection antibody.
- Incubation: Incubate the mixture for 60-120 minutes with agitation to form a sandwich immunocomplex on the bead surface.
- Washing: Magnetically capture beads and wash 3-4 times to remove unbound label and sample matrix.
- Elution: Beads are resuspended in a small volume of elution buffer to release the detection antibody from the immunocomplex. Alternatively, some protocols directly analyze beads.
- Single Molecule Counting: The final solution is aspirated into the Erenna system. The sample is hydrodynamically focused in a capillary flow cell and passed through a laser. Fluorescent bursts from single immunocomplexes are counted per unit time.
- Quantification: The counted events per second (or per unit volume) are plotted against the calibration curve to determine analyte concentration.
Protocol: Comparative Validation Study Design
To directly compare platforms for a novel metabolic biomarker:
- Sample Set: Prepare a panel of 30-50 clinically relevant biological fluid samples (e.g., CSF, plasma).
- Calibrators: Use the same purified protein standard across all platforms to prepare serial dilutions in the appropriate matrix.
- Parallel Testing: Run all samples and calibrators in duplicate on each platform (ELISA, Simoa, Singulex) according to their optimized protocols.
- Data Analysis: Calculate sensitivity (LLoQ from precision profile), precision (inter/intra-assay CV), and correlation (Passing-Bablok regression, Pearson's r) between methods.
Visualized Workflows and Pathways
Diagram 1: Comparative high-level workflows of ELISA and Simoa.
Diagram 2: Core digital detection principles of Simoa and Singulex.
The Scientist's Toolkit: Key Research Reagent Solutions
Table 3: Essential Materials for Ultrasensitive Immunoassay Development
| Item | Function & Importance | Platform Relevance |
|---|---|---|
| High-Affinity, Monoclonal Antibody Pairs | Critical for specificity and low background. Requires non-overlapping epitopes for sandwich assays. All platforms demand superior affinity (Kd < nM). | ELISA, Simoa, Singulex |
| Paramagnetic Beads (2-3 µm) | Solid phase for immunocapture. Enable efficient washing. Bead uniformity is vital for digital assay performance. | Simoa, Singulex |
| Low-Binding Microplates & Tubes | Minimizes nonspecific adsorption of low-concentration analytes and reagents, reducing background noise. | All platforms |
| Ultra-Pure Water & Buffers | Matrix components can interfere with enzyme conjugates or fluorescence. Low-autofluorescence, protein-stabilized buffers are essential. | All platforms |
| Enzyme Conjugates (β-Gal, HRP) | For signal generation. High specific activity and stability are required. SβG is standard for Simoa. | ELISA (HRP/AP), Simoa (β-Gal) |
| Fluorogenic Substrates (e.g., RGP) | Converted by enzyme to a fluorescent product. Must be stable, low background, and high turnover rate. | Simoa |
| Fluorophore-Labeled Antibodies (e.g., Alexa Fluor 647) | High quantum yield, photostable dyes are necessary for single-molecule detection without bleaching. | Singulex |
| Calibrator Protein Standard | Highly purified, accurately quantified native or recombinant protein for generating the standard curve. Critical for cross-platform comparison. | All platforms |
| Matrix-Matched Controls/Diluents | Artificial or pooled biological fluid used for standard dilution and as controls. Corrects for matrix effects. | All platforms |
| Automated Washer (Magnetic) | Ensures consistent and stringent washing to remove unbound material, a key factor in achieving low background. | Simoa, Singulex (ELISA) |
Discussion and Concluding Perspectives
Digital ELISA platforms offer a 100-1000x improvement in sensitivity over conventional ELISA, fundamentally expanding the explorable proteome in biological fluids. Simoa's strength lies in its enzymatic signal amplification within confined wells, while Singulex excels in direct single-fluorescent-particle counting with rapid kinetics. The choice of platform depends on the specific sensitivity requirement, analyte characteristics, available sample volume, and throughput needs.
For thesis research focused on low-abundance metabolic biomarkers, digital ELISA is often indispensable for baseline quantification. However, conventional ELISA remains robust, cost-effective, and high-throughput for analytes within its detection range. The future lies in integrating these technologies: using digital platforms for discovery and validation of ultra-low-level biomarkers, and transitioning to optimized conventional or multiplexed assays for later-stage clinical validation and routine monitoring.
Within a thesis focused on detecting low-abundance metabolic biomarkers in biological fluids, selecting an appropriate immunoassay platform is critical. Traditional Enzyme-Linked Immunosorbent Assay (ELISA) has been the cornerstone of quantitative protein analysis. However, the need to measure multiple analytes simultaneously from limited sample volumes—common in metabolic studies—has driven the adoption of multiplex bead-based assays, such as those utilizing Luminex xMAP technology. This technical guide provides an in-depth comparison of these platforms, emphasizing their multiplexing capabilities in the context of biomarker research.
Core Technology Comparison
ELISA (Enzyme-Linked Immunosorbent Assay)
ELISA is a plate-based, singleplex assay where a target antigen is captured by an immobilized antibody, detected by an enzyme-linked secondary antibody, and quantified via a colorimetric, chemiluminescent, or fluorescent reaction. Its fundamental design limits it to measuring one analyte per well.
Multiplex Bead-Based Assays (Luminex)
Luminex xMAP (Multi-Analyte Profiling) technology uses polystyrene or magnetic microspheres (beads) internally dyed with unique proportions of fluorescent dyes, creating distinct bead sets. Each set is conjugated to a capture antibody specific for a different analyte. Beads are mixed in a single well, allowing simultaneous capture of multiple targets, which are then detected using a biotinylated detection antibody and a reporter fluorophore (e.g., Streptavidin-PE). A dual-laser flow-based detector identifies the bead set (and thus the analyte) and quantifies the reporter signal.
Quantitative Data Comparison
Table 1: Platform Characteristics for Metabolic Biomarker Analysis
| Parameter | Standard Sandwich ELISA | Multiplex Bead-Based Assay (Luminex) |
|---|---|---|
| Multiplexing Capacity | 1 analyte per well | Typically 50-500 analytes per well (commercially available panels often 10-100 plex) |
| Sample Volume Required | 50-100 µL per analyte | 25-50 µL for a full multiplex panel |
| Dynamic Range | ~2-3 logs | ~3-4 logs |
| Assay Time (Hands-on) | High (separate plates for each analyte) | Low (multiple analytes in one plate) |
| Sensitivity (Typical) | Low pg/mL range | Comparable to low pg/mL range, can vary by analyte |
| Inter-analyte Interference Risk | None (singleplex) | Low, but requires rigorous cross-reactivity validation |
| Throughput for 10 Biomarkers | 10 wells per sample | 1 well per sample |
| Cost per Data Point | Lower for 1-5 analytes | Lower for >5 analytes |
Table 2: Performance in Low-Abundance Metabolic Biomarker Context
| Aspect | ELISA | Luminex |
|---|---|---|
| Matrix Effect Handling | Can optimize per analyte | Universal sample dilution may affect some low-abundance targets |
| Detection in Complex Fluids (Serum/Plasma/CSF) | Robust, well-characterized | Robust, but may require panel-specific optimization |
| Reproducibility (CV%) | Typically <10-12% | Typically <10-15% (can be higher for very low-abundance targets) |
| Ability to Detect Isoforms/Post-Translational Modifications | Requires separate, specific assay | Requires separate, specific bead set per modification |
Detailed Experimental Protocols
Protocol 1: Standard Sandwich ELISA for a Single Metabolic Biomarker
Objective: Quantify a specific low-abundance cytokine (e.g., Adiponectin) in human serum.
- Coating: Dilute capture antibody in carbonate-bicarbonate coating buffer (pH 9.6) to 1-10 µg/mL. Add 100 µL/well to a 96-well microplate. Seal and incubate overnight at 4°C.
- Washing: Aspirate and wash plate 3 times with 300 µL/well of PBS containing 0.05% Tween-20 (PBST).
- Blocking: Add 300 µL/well of blocking buffer (e.g., PBS with 1% BSA or 5% non-fat dry milk). Incubate for 1-2 hours at room temperature (RT). Wash 3x with PBST.
- Sample & Standard Incubation: Prepare serial dilutions of the recombinant protein standard in assay diluent (blocking buffer). Dilute serum samples 1:2 or 1:5 in diluent. Add 100 µL of standard or sample per well in duplicate. Incubate for 2 hours at RT. Wash 3x.
- Detection Antibody Incubation: Add 100 µL/well of biotinylated detection antibody (diluted per manufacturer's recommendation in assay diluent). Incubate for 1-2 hours at RT. Wash 3x.
- Enzyme Conjugate Incubation: Add 100 µL/well of Streptavidin-Horseradish Peroxidase (HRP) conjugate (diluted in assay diluent). Incubate for 30-60 minutes at RT. Wash 3x.
- Signal Development: Add 100 µL/well of chromogenic substrate (e.g., TMB). Incubate in the dark for 5-20 minutes.
- Stop Reaction & Readout: Add 50 µL/well of stop solution (e.g., 1M H2SO4). Immediately measure absorbance at 450 nm (reference 570 nm) using a plate reader.
- Analysis: Generate a 4- or 5-parameter logistic standard curve and interpolate sample concentrations.
Protocol 2: Multiplex Bead-Based Assay (Luminex) for a Cytokine Panel
Objective: Simultaneously quantify a 15-plex panel of inflammatory cytokines (e.g., IL-6, TNF-α, IL-1β, etc.) in human plasma.
- Bead Preparation: Vortex and sonicate the mixed antibody-coupled magnetic bead stock. Add the required volume of beads to a filter-bottom microplate to provide ~50 beads per set per well. Wash beads twice with 100 µL/well of wash buffer using a magnetic plate washer.
- Standard & Sample Addition: Prepare the provided standard in serial dilutions using the specified matrix. Dilute plasma samples 1:2 in assay diluent. Add 50 µL of standard, control, or sample to appropriate wells in duplicate.
- Incubation: Seal the plate and incubate on a plate shaker (500-600 rpm) in the dark for 1-2 hours at RT.
- Washing: Wash beads 3x with 100 µL wash buffer using a magnetic washer.
- Detection Antibody Incubation: Add 50 µL/well of the biotinylated detection antibody cocktail. Seal, and incubate on a plate shaker for 1 hour at RT. Wash 3x.
- Streptavidin-Phycoerythrin (SAPE) Incubation: Add 50 µL/well of Streptavidin-Phycoerythrin (diluted per protocol). Seal, and incubate on a plate shaker for 30 minutes at RT. Wash 3x.
- Bead Resuspension & Reading: Add 100-125 µL/well of reading buffer. Shake for 5 minutes. Analyze on a Luminex analyzer (e.g., MAGPIX, FLEXMAP 3D). The analyzer identifies each bead by its internal dye signature (laser 1) and quantifies the PE reporter signal bound to it (laser 2).
- Analysis: Use instrument software to generate standard curves for each analyte and calculate sample concentrations.
Visualizations
Title: ELISA vs Luminex Experimental Workflow Comparison
Title: Decision Logic for ELISA vs Multiplex Assay Selection
The Scientist's Toolkit: Research Reagent Solutions
Table 3: Essential Materials for Immunoassay-Based Biomarker Research
| Item | Function in Research | Key Considerations for Low-Abundance Targets |
|---|---|---|
| High-Affinity, Validated Antibody Pairs | Capture and detect the target antigen with specificity and sensitivity. | Minimal cross-reactivity; affinity (Kd) in nM to pM range; validate in your specific biological matrix. |
| Matrix-Matched Assay Diluent | Dilutes standards and samples while minimizing non-specific background. | Must contain blockers (BSA, casein) and detergents to counter matrix effects in serum/plasma/CSF. |
| Low-Binding Microplates / Magnetic Beads | Solid phase for immunoassay. Minimizes passive protein adsorption. | Increases assay precision and recovery of low-concentration analytes. |
| Recombinant Protein Standards | Quantitative calibrator for generating the standard curve. | Should be highly pure and identical to native protein for accurate quantification. |
| High-Sensitivity Detection System | Enzyme/fluorophore system for signal generation and measurement. | For ELISA: consider chemiluminescent > fluorescent > colorimetric. For Luminex: ensure analyzer is optimized for low PE signal. |
| Luminex xMAP Magnetic Bead Panels | Pre-configured, validated multiplex panels. | Choose panels specifically designed for your sample matrix (e.g., serum/plasma). Verify lower limit of quantification (LLOQ) for each analyte. |
| Automated Magnetic Plate Washer | Consistent and efficient bead/well washing. | Critical for reducing background and variability, especially in multiplex assays. |
Assessing Cost-Effectiveness, Throughput, and Ease of Clinical Implementation
1. Introduction The reliable measurement of low-abundance metabolic biomarkers in biological fluids (e.g., serum, plasma, cerebrospinal fluid) is critical for early disease diagnosis, therapeutic monitoring, and novel drug development. Enzyme-Linked Immunosorbent Assay (ELISA) remains a cornerstone technology for specific protein quantification. Within the broader thesis on optimizing ELISA for trace-level analytes, this technical guide provides a structured framework to assess three pivotal performance criteria: Cost-Effectiveness, Throughput, and Ease of Clinical Implementation. A holistic evaluation across these dimensions is essential for researchers and developers to select and optimize the most viable assay platform for translational research and clinical adoption.
2. Quantitative Assessment Framework
2.1. Cost-Effectiveness Analysis Cost-effectiveness extends beyond reagent kit price, encompassing total operational expenditure per data point.
Table 1: Cost Breakdown for a Standard 96-well Colorimetric ELISA (Per Plate Analysis)
| Cost Component | Approximate Cost (USD) | Details & Rationale |
|---|---|---|
| Commercial ELISA Kit | $400 - $650 | For a target metabolic biomarker (e.g., FGF-21, Adiponectin). Bulk discounts apply. |
| Consumables | $50 - $100 | Includes pipette tips, tubes, sealing films, gloves. |
| Labor | $150 - $300 | Based on 3-4 hours of technician time at institutional rates. |
| Equipment Depreciation/Use | $25 - $50 | Microplate reader, washer, incubator. |
| Calibration & Controls | Included in Kit | Requires dedicated wells, reducing sample throughput. |
| Total Cost per 96-well Plate | $625 - $1100 | |
| Cost per Usable Sample (40 samples/plate) | $15.60 - $27.50 | Assumes duplicates of 40 unknowns + standards/controls. |
Key Consideration: "In-house" or "capture" ELISA development incurs high upfront R&D and validation costs but can reduce long-term per-test costs significantly for very high-volume targets.
2.2. Throughput and Automation Potential Throughput is defined as the number of samples reliably processed per unit time (e.g., per day).
Table 2: Throughput Comparison of ELISA Workflow Configurations
| Workflow Configuration | Manual Processing | Semi-Automated (Liquid Handler + Washer) | Fully Automated System |
|---|---|---|---|
| Plates Processed per 8-hr Day | 4 - 6 | 8 - 12 | 20+ |
| Total Samples per Day (40/plate) | 160 - 240 | 320 - 480 | 800+ |
| Key Bottleneck | Incubation timing, manual washing/transfer | Initial setup, data review | System maintenance, upfront cost |
| Inter-Operator Variability Risk | High | Medium | Low |
| Best For | Low-volume studies, pilot assays | Core labs, mid-size cohorts | Large-scale epidemiological studies, clinical trials |
2.3. Ease of Clinical Implementation This assesses the path from research assay to clinically usable test.
- Regulatory Pathway: FDA 510(k) or CLIA Laboratory Developed Test (LDT) compliance requires rigorous validation per guidelines (e.g., ICH, CLSI EP17).
- Validation Parameters: Must demonstrate precision (CV < 20% for low-abundance), accuracy (spike recovery 80-120%), sensitivity (LoD/LoQ), linearity, and stability.
- Sample Compatibility: The assay must be validated for specific clinical matrices (e.g., EDTA vs. heparin plasma) which can differentially affect biomarker recovery.
- Result Reporting: Integration with Laboratory Information Systems (LIS) is a practical necessity for clinical labs.
3. Experimental Protocols for Enhanced Performance
3.1. Protocol for Sensitivity Optimization (LoD Enhancement) Objective: To lower the limit of detection for a low-abundance target.
- Signal Amplification: Employ a streptavidin-biotin amplification system. Use a biotinylated detection antibody followed by Streptavidin-Horseradish Peroxidase (SA-HRP) at an optimized dilution (e.g., 1:10,000 to 1:20,000).
- High-Sensitivity Substrate: Replace standard TMB with a more sensitive, single-component, stabilized formulation (e.g., SuperSignal ELISA Pico or Ultra TMB).
- Extended Incubation: Increase the capture antibody coating step to 18-24 hours at 4°C. Extend sample and detection antibody incubations to 2 hours at room temperature with gentle shaking.
- Signal Read Optimization: Use a luminometer if using a chemiluminescent substrate, or read absorbance at 450 nm with a reference wavelength (e.g., 620 nm) to reduce noise.
- Data Analysis: Calculate LoD as mean signal of zero calibrator + 3*(standard deviation), derived from at least 20 independent replicates.
3.2. Protocol for Precision Profiling Across a Clinical Cohort Objective: To assess inter-assay precision in a realistic study context.
- Sample Pooling: Create three quality control (QC) pools: Low, Medium, and High concentration by mixing relevant clinical samples.
- Plate Layout: On every assay plate (run over at least 5 separate days), include duplicates of the standard curve and all three QC pools in randomized positions.
- Analysis: Calculate the mean concentration and coefficient of variation (CV%) for each QC pool across all runs. For clinical feasibility, total CV% should ideally be <15%.
4. Visualization of Workflow and Decision Logic
Title: Decision Logic for ELISA Platform Selection
Title: Enhanced Sensitivity ELISA Workflow
5. The Scientist's Toolkit: Key Research Reagent Solutions
Table 3: Essential Reagents for High-Performance Metabolic Biomarker ELISA
| Reagent/Material | Function & Rationale |
|---|---|
| High-Affinity, Monoclonal Capture Antibody | Provides specificity and sets the foundation for assay sensitivity. Essential for capturing the low-abundance target. |
| Biotinylated Polyclonal Detection Antibody | Offers high sensitivity through multiple biotin tags per antibody, enabling signal amplification in the next step. |
| Streptavidin-HRP Conjugate | Binds multiple biotins, amplifying the signal. Critical for detecting sub-pg/mL concentrations. |
| High-Sensitivity Chemiluminescent Substrate | Generates amplified light signal upon enzyme reaction, offering a wider dynamic range and lower background than colorimetric substrates. |
| Matrix-Matched Calibrators & Controls | Calibrators prepared in the same analyte-free biological matrix (e.g., stripped serum) as samples. Controls monitor assay performance across runs. |
| Low-Binding Microplates & Pipette Tips | Minimizes non-specific adsorption of the low-abundance target protein, improving accuracy and reproducibility. |
| Stable, Lot-to-Lot Consistent Blocking Buffer | Typically 1-5% BSA or a proprietary protein solution in PBS. Reduces background noise by blocking non-specific binding sites. |
The Role of ELISA in Orthogonal Validation and Clinical Assay Development
Within the context of a broader thesis on detecting low-abundance metabolic biomarkers in biological fluids, the Enzyme-Linked Immunosorbent Assay (ELISA) remains a cornerstone technology. Its primary roles are in the orthogonal validation of novel discovery-phase assays (e.g., mass spectrometry) and in the translation of those findings into robust, high-throughput clinical assays. For low-abundance targets in complex matrices like serum, plasma, or cerebrospinal fluid, ELISA provides the specificity, sensitivity, and reproducibility required for clinical validation and diagnostic use. This whitepaper details the technical application of ELISA within this specific workflow.
ELISA in the Orthogonal Validation Workflow
Orthogonal validation employs a method with differing physicochemical principles to confirm initial analytical results. For biomarker candidates identified via untargeted LC-MS/MS or other discovery platforms, ELISA serves as the gold-standard orthogonal method due to its immunological basis, contrasting with the mass-based separation of MS.
Key Validation Parameters Assessed via ELISA:
- Specificity: Confirms the immunoreactive signal is from the intended biomarker and not cross-reactive analogues.
- Accuracy/Recovery: Determined by spiking known quantities of purified analyte into biological matrix.
- Precision: Intra- and inter-assay coefficients of variation (CV) are calculated.
- Limit of Detection (LOD) & Quantification (LOQ): Critical for low-abundance biomarkers.
- Linearity & Dynamic Range: Must be suitable for expected physiological and pathological concentrations.
Table 1: Representative Validation Data for a Hypothetical Low-Abundance Cardiac Biomarker (cTnI) Assay
| Validation Parameter | Experimental Result | Acceptability Criterion |
|---|---|---|
| Lower Limit of Detection (LLoD) | 1.2 pg/mL | < 5 pg/mL |
| Lower Limit of Quantification (LLoQ) | 4.5 pg/mL (20% CV) | < 10 pg/mL |
| Intra-assay Precision (CV%) | 4.8% (at 50 pg/mL) | < 10% |
| Inter-assay Precision (CV%) | 8.2% (at 50 pg/mL) | < 15% |
| Spike Recovery (in Serum) | 94% - 106% | 80% - 120% |
| Linearity (on Dilution) | R² = 0.998 | R² > 0.990 |
| Cross-reactivity (vs. cTnT) | < 0.01% | < 1% |
Detailed Protocol: Sandwich ELISA for Biomarker Validation
This protocol is for a colorimetric sandwich ELISA, optimal for quantifying protein biomarkers in biological fluids.
A. Materials & Reagent Preparation
- Coated Plate: 96-well microplate pre-coated with capture antibody.
- Assay Diluent: PBS with 1% BSA, 0.05% Tween-20, pH 7.4.
- Standards: Recombinant biomarker protein serially diluted in analyte-free matrix.
- Samples: Biological fluids (e.g., serum, plasma). Centrifuge at 10,000xg for 10 min before use.
- Detection Antibody: Biotin-conjugated monoclonal antibody.
- Streptavidin-HRP: Horseradish peroxidase conjugate.
- Substrate: TMB (3,3',5,5'-Tetramethylbenzidine).
- Stop Solution: 1M H₂SO₄ or HCl.
- Wash Buffer: PBS with 0.1% Tween-20 (PBST).
B. Step-by-Step Procedure
- Plate Preparation: Use pre-coated plate. Wash 3x with 300 µL wash buffer.
- Sample & Standard Addition: Add 100 µL of standards, samples (diluted if necessary), and controls in duplicate to appropriate wells. Include blank wells (diluent only). Cover, incubate 2 hours at room temperature (RT) on orbital shaker.
- Wash: Aspirate and wash plate 5x with wash buffer.
- Detection Antibody: Add 100 µL of biotinylated detection antibody (diluted in assay diluent). Cover, incubate 1 hour at RT on shaker.
- Wash: Aspirate and wash plate 5x.
- Enzyme Conjugate: Add 100 µL of Streptavidin-HRP (diluted per manufacturer). Cover, incubate 30 minutes at RT in the dark.
- Wash: Aspirate and wash plate 7x.
- Substrate Addition: Add 100 µL of TMB substrate. Incubate for precisely 10-20 minutes at RT in the dark (monitor color development).
- Stop Reaction: Add 100 µL of stop solution. The blue color will turn yellow.
- Read Plate: Measure absorbance at 450 nm (reference 570 nm or 620 nm) within 30 minutes.
- Data Analysis: Generate a 4- or 5-parameter logistic standard curve. Calculate sample concentrations from the curve, applying any necessary dilution factors.
Visualizing Workflows and Relationships
Title: Biomarker Validation Workflow
Title: Sandwich ELISA Step-by-Step Process
The Scientist's Toolkit: Essential Research Reagent Solutions
Table 2: Key Reagents for Low-Abundance Biomarker ELISA Development
| Reagent / Solution | Critical Function & Rationale |
|---|---|
| High-Affinity, Specific Antibody Pair | The foundation of assay performance. Must recognize non-overlapping epitopes on the target analyte with high affinity (Kd in nM-pM range) to ensure sensitivity and specificity. |
| Analyte-Depleted Matrix | Serves as the diluent for standard curve preparation. Essential for achieving a parallel standard curve to correct for matrix effects (e.g., human serum albumin, IgG). |
| Stable, Recombinant Antigen | Used for standard curve generation and spike-recovery experiments. Must be purified, fully characterized, and structurally identical to the native biomarker. |
| Signal Amplification System | Enhances sensitivity for low-abundance targets. Common systems: biotin-streptavidin with poly-HRP, or tyramide-based amplification (TSA). |
| Low-Binding Microplates | Minimizes non-specific adsorption of proteins, crucial for accurate measurement of low-concentration biomarkers. |
| Blocking Buffer (e.g., BSA, Casein) | Blocks non-specific binding sites on the plate and assay components to reduce background noise and improve signal-to-noise ratio. |
| High-Sensitivity Chromogenic/Luminescent Substrate | TMB for HRP is common; ultrasensitive luminescent substrates (e.g., enhanced luminol) can lower LoD by 10-100 fold. |
| Precision Liquid Handling Equipment | Automated pipettors and plate washers are mandatory for achieving the low intra-assay CVs (<10%) required for clinical assay development. |
Conclusion
The detection of low-abundance metabolic biomarkers via ELISA is a nuanced but highly achievable goal, blending classical immunoassay robustness with cutting-edge enhancements. By understanding the foundational challenges, implementing advanced methodological adaptations, rigorously troubleshooting performance, and critically validating against platform alternatives, researchers can reliably push ELISA into the femtomolar and sub-femtomolar range. This capability solidifies ELISA's enduring role not just as a discovery tool, but as a vital platform for the scalable clinical validation of novel biomarkers. Future directions will likely involve tighter integration with -omics datasets, further automation, and the development of even more stable affinity reagents, ultimately accelerating the translation of subtle metabolic signatures into early diagnostics, personalized therapeutic monitoring, and novel drug targets. For the research and drug development community, mastering these techniques is key to unlocking the rich, information-dense world of low-abundance biomarkers.